How to connect Deco with Starlink
There are two generations of Starlink Satellite Dish: The Gen-1 Terminal (Circular Dish) and the Gen-2 Terminal (Rectangular Dish). The main difference between the two versions is the removal of the Ethernet Jack. So with a Gen-2 Terminal, you must purchase an Ethernet Adapter from Starlink first to connect a third-party router.
Head below to learn how to connect Deco to the Starlink Terminal.
For the updated Gen-2 Starlink User Terminal
Unlike the Original Starlink Terminal, the Gen-2 Dish is Rectangular, and no PoE adapter is included. The Rectangular Dish will be directly powered by the Gen-2 Starlink router. Since there is no more Ethernet jack on the Gen-2 Starlink router, you must purchase an Ethernet Adapter from Starlink to Connect Deco.
- Connect Deco together with Gen-2 Starlink router

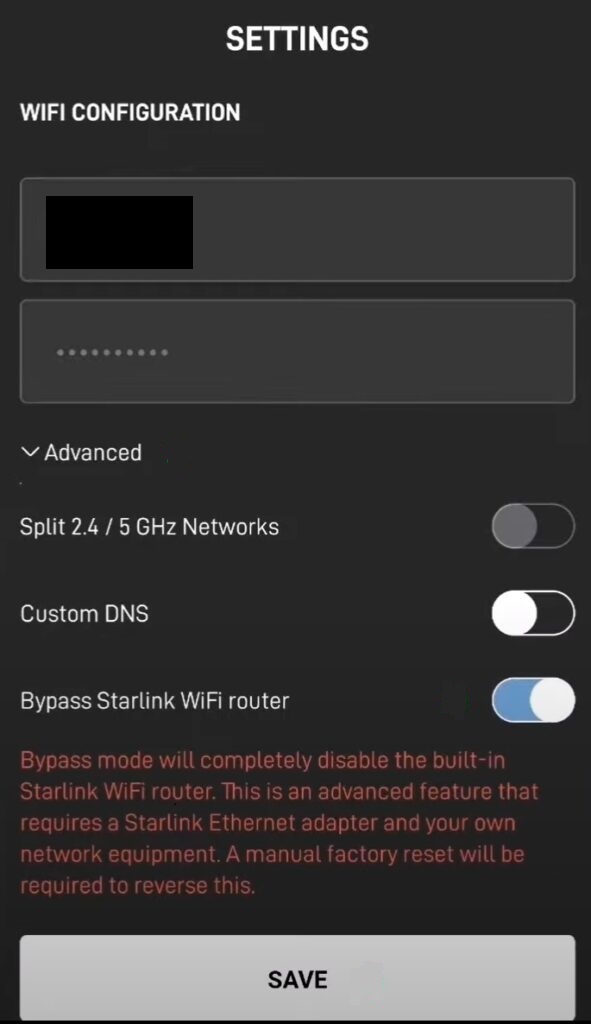
Gen-2 Starlink router supports Bypass mode that will completely disable the built-in Starlink WiFi router functionality. A factory reset is required if you want to switch back to router mode. So when Deco is connected to the Ethernet adapter, there are two recommended setups.
- Enable Bypass mode on Starlink APP under Settings>Advanced, then set up Deco in wireless router mode.

- Leave Bypass mode disabled on Starlink APP, then set up Deco in Access Point mode.
For the original Gen-1 Starlink User Terminal
- Connect Deco without Gen-1 Starlink router

Follow this guide to set up Deco.
- Connect Deco together with Gen-1 Starlink router

On this network topology, please connect Deco to the AUX port of the Gen-1 Starlink Router. Since the default operation mode on Deco is also a wireless router, to avoid of double NAT issue, it is suggested to change Deco into Access Point mode.
Follow this guide to change Deco into Access Point mode.
For any further inquiries about Deco setup or configuration with Starlink, please contact our technical support.
Был ли этот FAQ полезен?
Ваш отзыв поможет нам улучшить работу сайта.