How to configure my TL-WA5110G or TL-WA5210G to work on Client Mode
Este artículo se aplica a:
|
The topology below shows how an AP client works.
|
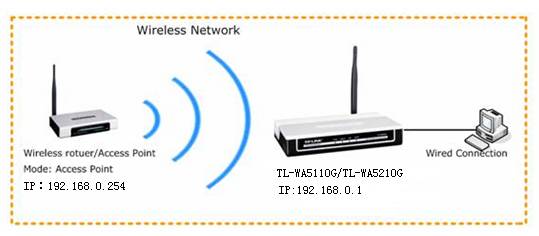 Here we take the following information as an example. However, you need configure it properly according to the basic information of your own router.
Information of Root Router:
Preparation:
Since the DHCP function on the AP is disabled by default, we have to manually assign an IP address for the computer to match the IP address (192.168.1.254 in default) of the Client. Please click here for detailed instructions.
Here, you can configure the IP address as 192.168.1.100/255.255.255.0.
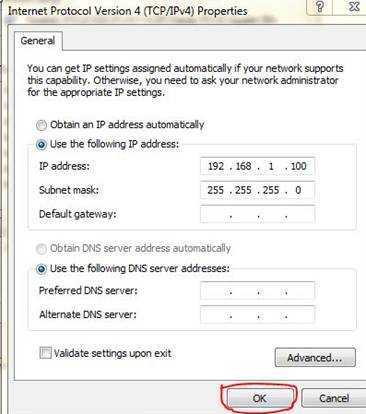 Connect the computer to the LAN port of AP with an Ethernet cable.
Configuration on Client (TL-WA5110G OR TL-WA5210G):
Step 1
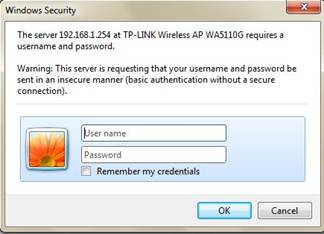
Log onto the Client’s management page.
In the address bar, type in http://192.168.1.254, then press enter.
 Then type in the username and password, which are both “admin” in default.
 Step 2
Click Network on the left side menu. Please make sure the AP’s IP address is in the same IP segment with the Root Router’s to avoid the IP conflict. In this instance, we can change the IP to “192.168.0.1”. Then click Save.
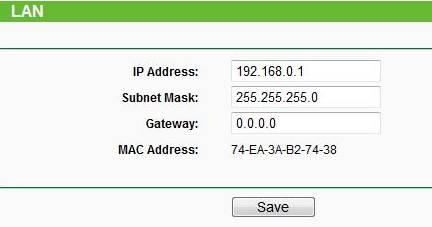 And then change the IP address of your computer back to 192.168.0.100/255.255.255.0, logon the web page with 192.168.0.1 again.
Step 3
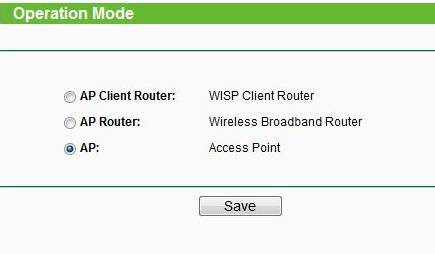
On the left side menu, click on Operation Mode, selectAP/Standard APmode, and clickSave.
 Step 4
Click Wireless ->Wireless mode. Select Client as the wireless Mode. Then click Survey.
 Step 5
Find the Root Router’s SSID on the AP list, and click Connect.
 Step 6
Click Save.
If you see this picture, please wait until it refresh back to the status page.
 Step 7
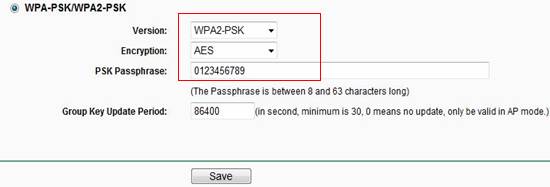
Click Wireless ->Security settings. You must make sure the Security type of your root AP. Here we take wpa2-psk as a example. Select WAP-PSK/WPA2-PSK, and type in the password “0123456789”. Then click Save.
 After you go through all the above steps, the Client should work properly with the Root Router.
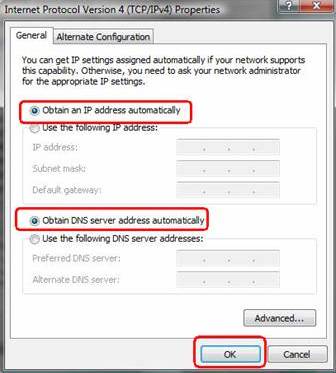
Please re-configure the IP settings of your computer to Obtain an IP address automatically/Obtain a DNS server address automatically in order to connect to Internet after all the settings, click here for detailed instructions. Then you can check the connectivity by using Ping in command prompt on that computer. For how to use Ping, please refer to how to use Ping command.
 NOTE:
If you have a broadband router which provide you Internet connection, please re-configure the IP settings of your computer to Obtain an IP address automatically/Obtain a DNS server address automatically to suitable for the router in order to connect to Internet after done the settings.
 If the Ping is not successful, please check all above settings carefully, or contact TP-Link support for help.
|
¿Es útil esta faq?
Sus comentarios nos ayudan a mejorar este sitio.