How to remove the existing wireless network profile in Windows Vista
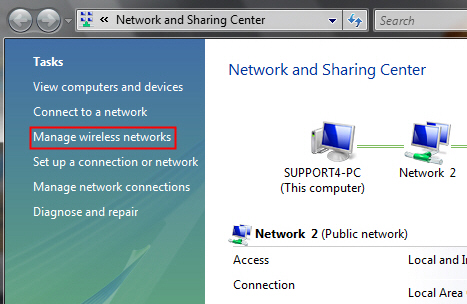
Step 1
Click start button on the task bar, open Control Panel -> (click Network and Internet, if you can´t find it, please go next) -> double click Network and Sharing Center.
Step 2
In the task list, please choose Manage wireless networks.
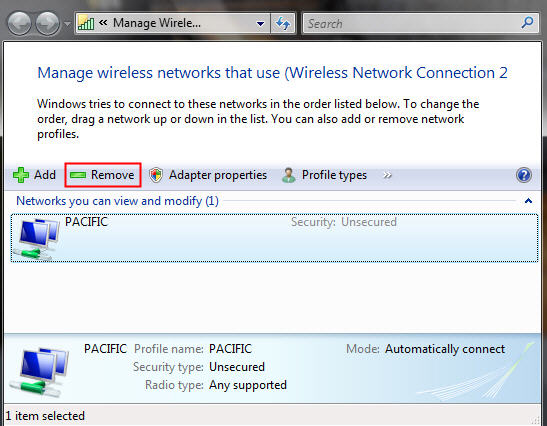
Step 3
In the Network table, please select the existing profiles and click Remove.
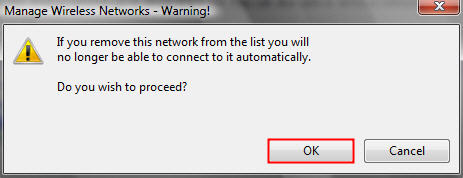
Step 4
You may see a warning dialog box, just click OK.
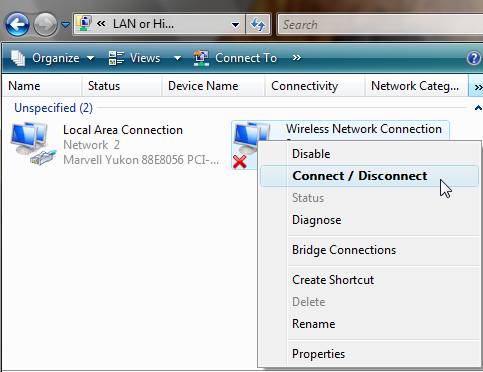
Step 5
Then you go back to Network and Sharing Center dialog box, and choose Manage network connections -> right click Wireless Network Connection -> click Connect/Disconnect.
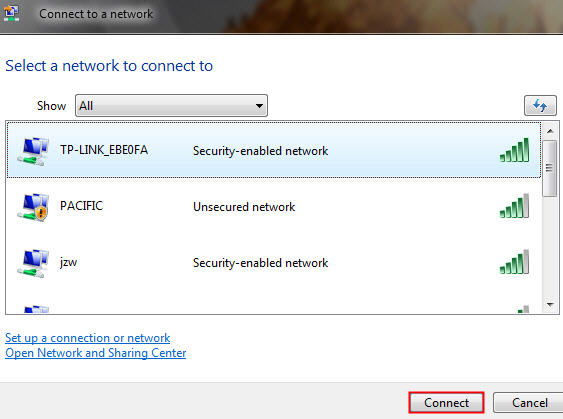
Step 6
Click the refresh button to view available wireless networks. Select the correct network which you want to connect, double click it or click Connect button.
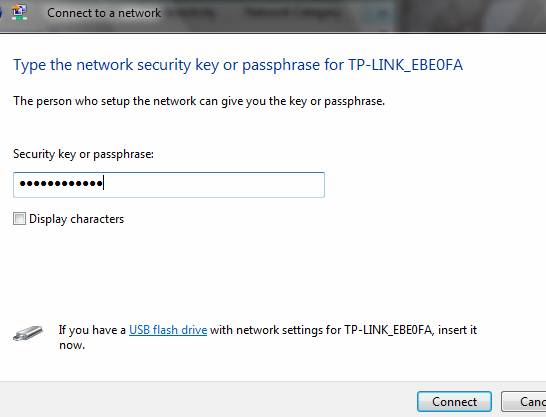
Step 7
If the wireless network is secured, it will pop up a window asking for the security key or passphrase. Enter the correct key then click Connect.
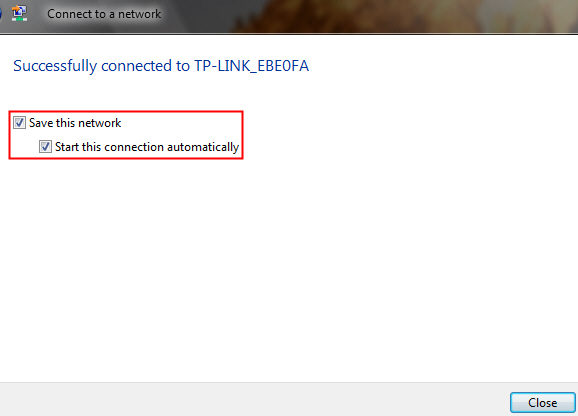
Step 8
Save the network and connection, and click Close.
Note:
1. If it keeps connecting to the network or acquiring IP address, please check if you had entered the correct security key/passphrase.
2. If it shows that the connection is Limited or no connectivity, please ensure that you had enabled DHCP server on the wireless router/access point.
Finden Sie diese FAQ hilfreich?
Mit Ihrer Rückmeldung tragen Sie dazu bei, dass wir unsere Webpräsenz verbessern.
Von United States?
Erhalten Sie Produkte, Events und Leistungen speziell für Ihre Region