How to configure the TL-WPS510U working on Infrastructure mode through its web page for MAC OS
For better guidance, let's assume there is a following demand for the network:

The wireless router is the center of the wireless network and every host(client) will communicate with the TL-WPS510U through the wireless router. The local network is 192.168.11.0/255.255.255.0 with a wireless router 192.168.11.1, and the TL-WPS510U is required to set its IP to 192.168.11.10.
Here are the steps to achieve the goal:
Step 1
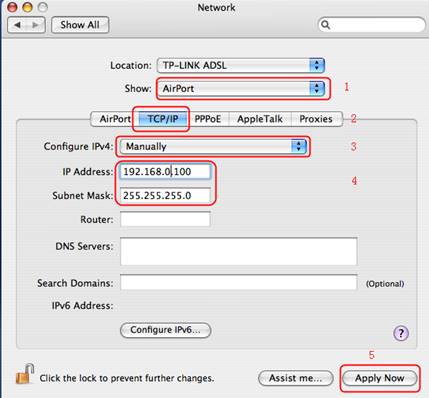
On the MACbook, change the airport’s IP to 192.168.0.100/255.255.255.0. Since the default IP address of the TL-WPS510U is 192.168.0.10, you need to set the MACbook airport’s IP to the same subnet of the print server.
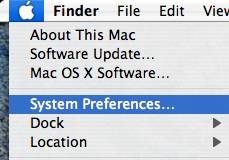
Click the Apple Icon on the left side of the top-bar, and then choose System Preferences.
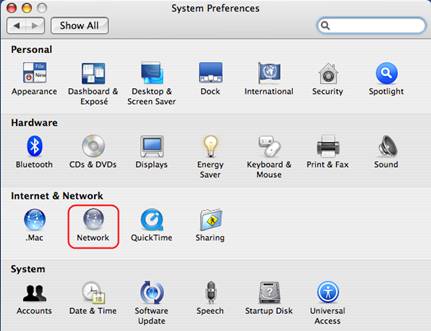
On the new window, please choose Network
Follow the steps to set the airport’s IP address
Step 2
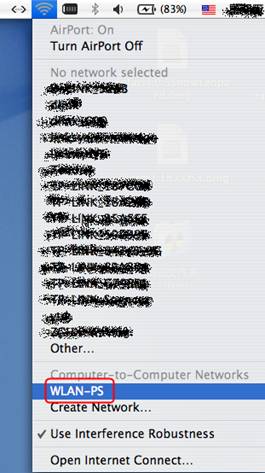
Connect your MACBOOK to the TL-WPS510U. The print server will work on Ad-Hoc mode, with the SSID WLAN-PS in factory default. So please select the wireless network WLAN-PS to connect. If you need to reset the TL-WPS510U but don’t know how to do, please refer to the FAQ: How to Reset the TL-WPS510U to Factory Default

Step 3
Open the Safari, type in 192.168.0.10, press Enter; It will ask for Username and Password to log in, type in admin for both.

Step 4
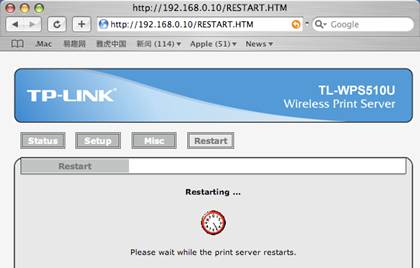
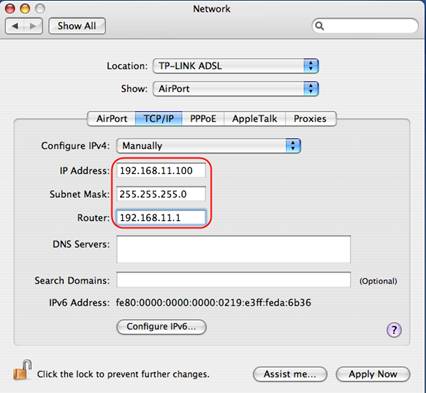
Change its IP address to 192.168.11.10/255.255.255.0, Default Router is 192.168.11.1. The TL-WPS510U will save and reboot after the configuration.

Step 5
On the MACBOOK, change the airport’s IP to 192.168.11.100/255.255.255.0 Router is 192.168.11.1, and connects to the Ad-Hoc network WLAN-PS again.
Step 6
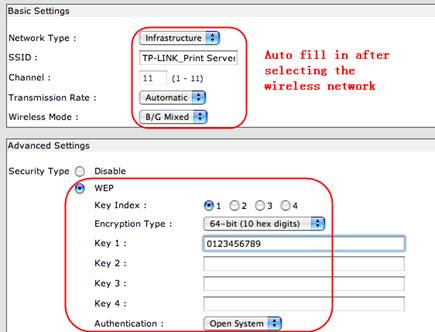
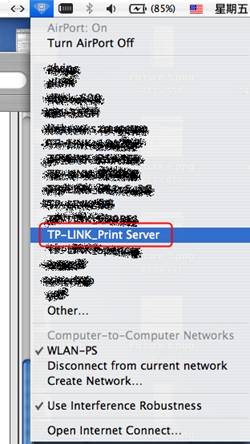
Log into the TL-WPS510U and configure the wireless parameters according to your wireless network. In this example, the SSID is TP-Link_Print Server, and the security type is WEP-64bit Hex Open, with the password set to 0123456789. After the configuration, the TL-WPS510U also need to save and reboot again.
If you are not sure the wireless security settings, please check it on your wireless router.
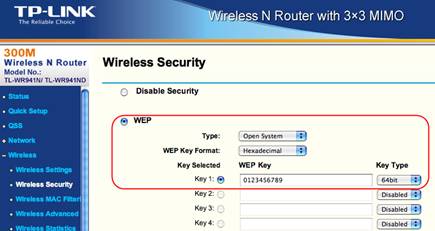
Log into the TL-WPS510U with http://192.168.11.10, click Setup and then Wireless. And just select the TP-Link_Print Server wireless network and set the wireless security.


Step 7
On MACBOOK, go back to TCP/IP settings as shown in step 4, and change "Configure IPv4" back to "Using DHCP" and save the change. Then connect router's wifi, which is TP-Link_Print Server and the password is 0123456789, as mentioned in step 5.

Step 8
Try to access the TL-WPS510U and can see it in the wireless router’s host list. This means the TL-WPS510U is working on Infrastructure mode and can communicate with the wireless router and your MACBOOK.

Step 9
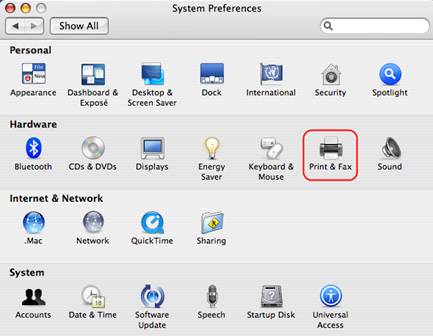
Add a Standard TCP/IP port for the printer.
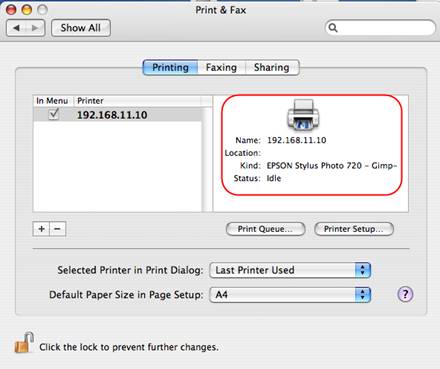
Click the Apple icon -> System Performances -> Print & Fax
follow the steps:
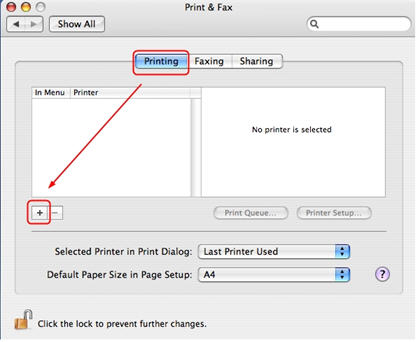
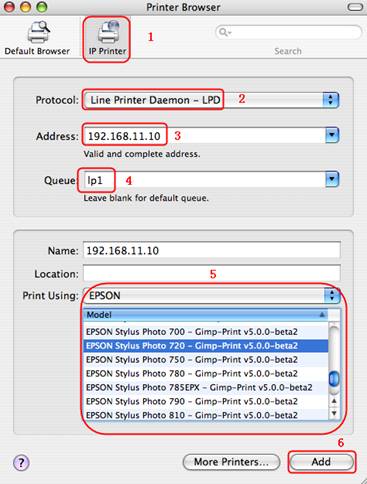
Select in the options
Protocol: LPD
Address: 192.168.11.10
Queue:lp1
And then select your printer model. For example my printer is EPSON Style Photo 720.
Step 10
After that, you´ve installed the print server successfully.
Now you can print through the TL-WPS510U.
This Article Suits for:
Полезен ли беше този ЧЗВ?
Вашите отзиви помагат за подобряване на този сайт.
Вашите отзиви помагат за подобряване на този сайт.
User Application Requirement | Updated 05-11-2015 03:08:41 AM