How to use DDNS features on a Deco router
What is DDNS?
DDNS, most commonly known as Dynamic DNS, is an automatic method of refreshing a name server. It can dynamically update DNS records without the need for human interaction. It is extremely useful for updating IP address records when the public IP address changes.
Usage Scenarios
Imagine this situation. You have a local server at home such as a NAS, camera or web server, etc., and you would like to access the local server when you are not at home.
You are using a standard/consumer-grade internet from a typical ISP (Internet service provider) and getting a temporary public IP address that could change the next time you connect or change automatically after some time.

To achieve it, you will need to do port forwarding for the local server first, then use the public IP address: external port to access the local server remotely, for example, if your public IP address is 101.1.1.1, your local server is using port 80 and external port is 8000 when you configure the port forwarding for it, you will need to use 101.1.1.1:8000 to access the local server remotely. However, what if the public IP address changes without you knowing it?
You have 3 options:
1) Ask for a static IP address from your ISP, which could be expensive
2) Check the public IP address manually at home every time when it changes, which is quite inconvenient and might not be possible if no one is at home
3) Use the DDNS function to automatically update the IP addresses
Obviously, the DDNS function is the best option. With DDNS, It will automatically and periodically update the dynamic public IP address for the fixed domain name, you don’t need to worry about the changes in IP addresses anymore because you could always use the fixed domain name: external port to access the local server remotely.
How to set up DDNS on Deco
Before you start
Upgrade your Deco to the latest version before you use the DDNS feature.
Here is the instruction to update the Deco’s firmware.
Note: Features available in Deco may vary by model and software version. All steps and images described here are only examples and may not reflect your actual Deco experience.
Here we take Deco M5 for example.
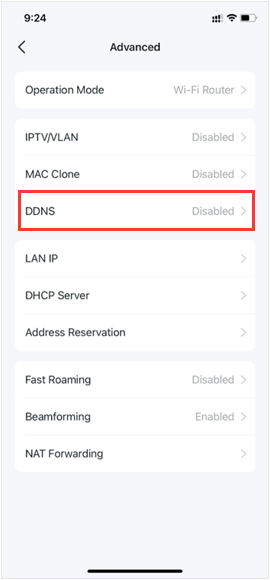
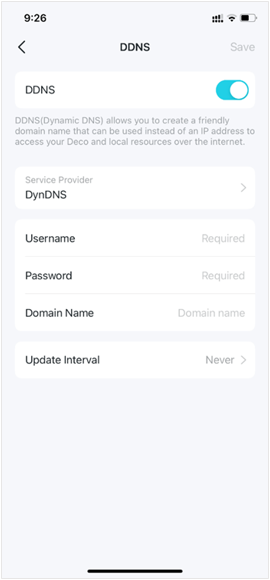
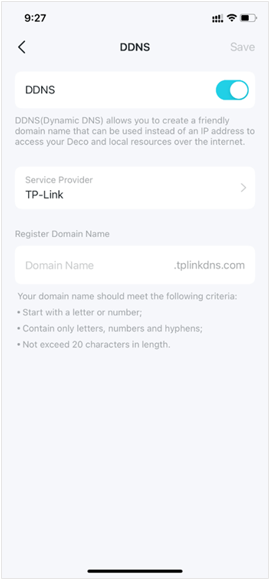
1. Open the Deco app. Go to the More tab and select Advanced > DDNS and enable it.
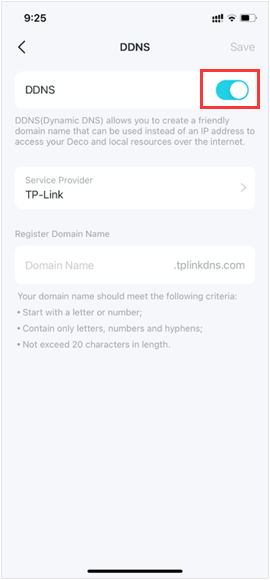
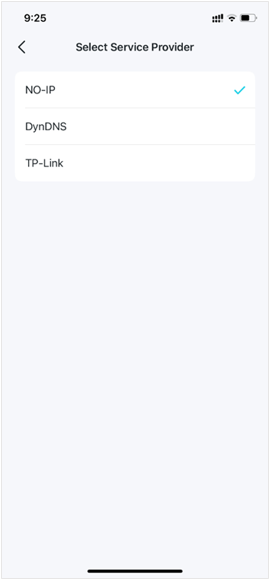
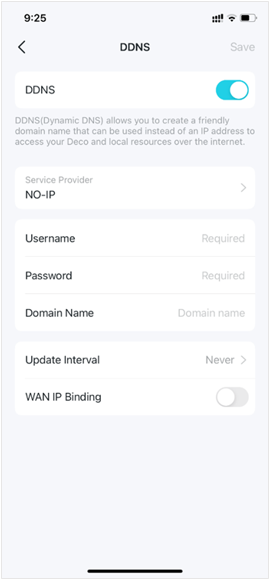
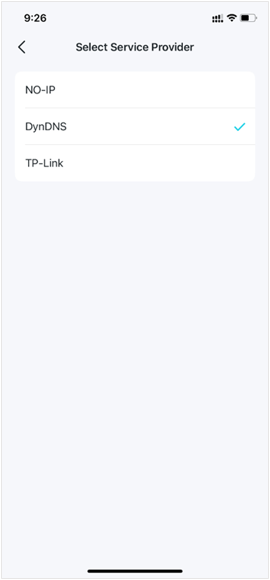
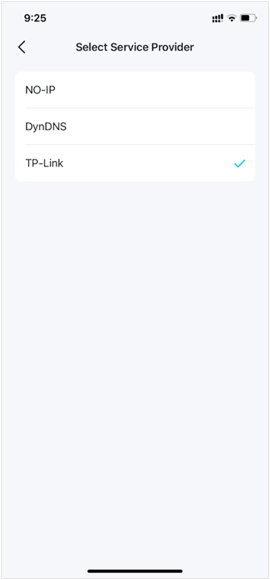
2. Select a service provider and fill in the necessary information. Then save the settings.
- NO-IP
- DynDNS
- TP-Link
For more information or troubleshooting guides about the DDNS function, please refer to this FAQ
¿Es útil esta pregunta frecuente?
Sus comentarios nos ayudan a mejorar este sitio.