Note: This article applies to the situation that failed to install the adapter through .EXE program and the adapter has .inf file to download.
(please download the latest driver from TP-Link official site, and extract the zip file to see whether your adapter has .inf file.)
Before the installation, please download the latest driver from TP-Link official website, you can click here to go to the download page.
Note: If there already is a driver but it's not working, you need to uninstall it first before installing the new driver. (control panel》program》uninstall program》uninstall driver for our wireless adapter)
Then please follow the steps below:
Step 1
Insert the adapter onto your computer.
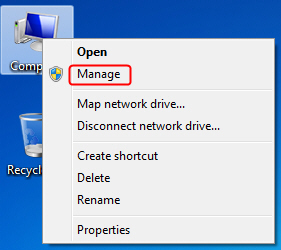
Step 2
Right click Computer, and then click Manage.
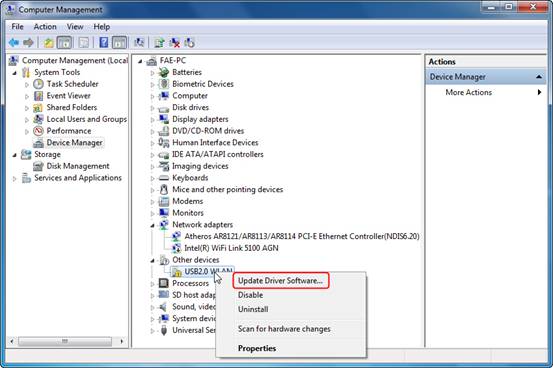
Step 3
Open Device Manager. Right click the adapter and then click Update Driver Software....
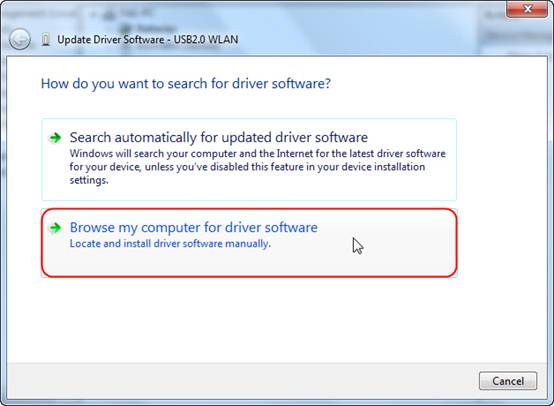
Step 4
Click Browse my computer for driver software.
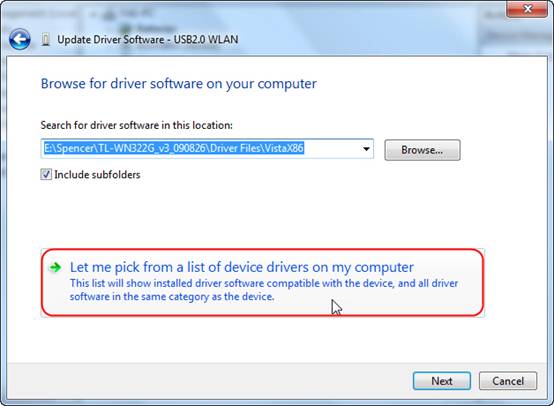
Step 5
Click Let me pick from a list of device drivers on my computer.
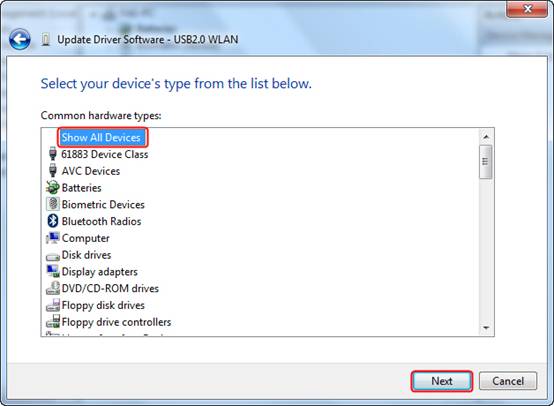
Step 6
Highlight Show All Devices and click Next.
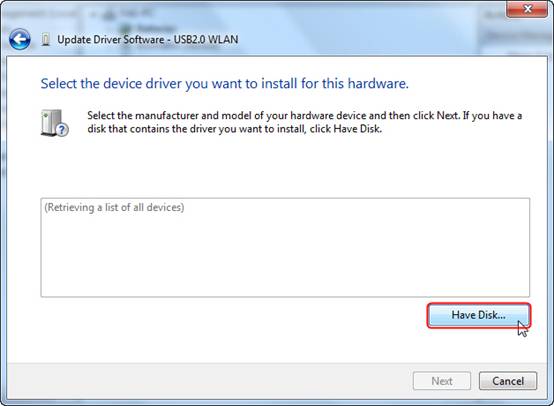
Step 7
Click Have Disk.
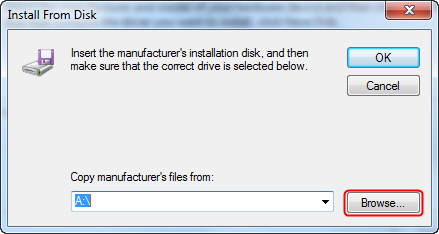
Step 8
Click Browse.
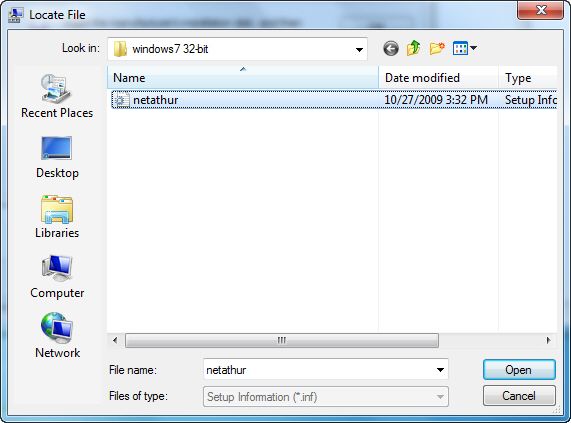
Step 9
Point to the inf file in the driver folder, and then click Open.
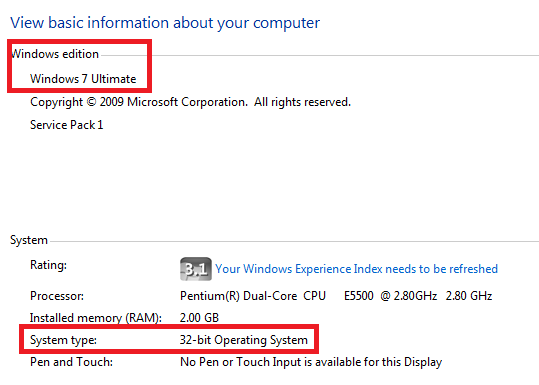
Note: Please click start button, right click Computer and go to properties to confirm operating system and system type of your computer.
Step 10
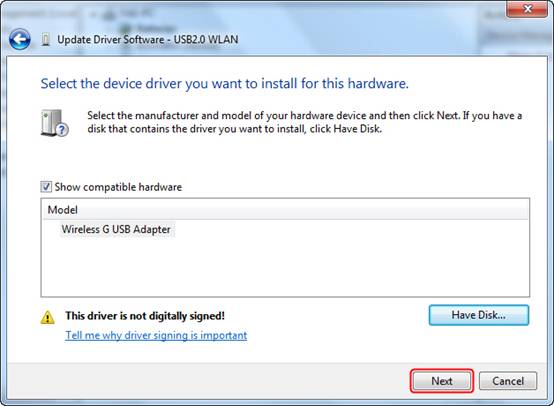
Click Next.
Step 11
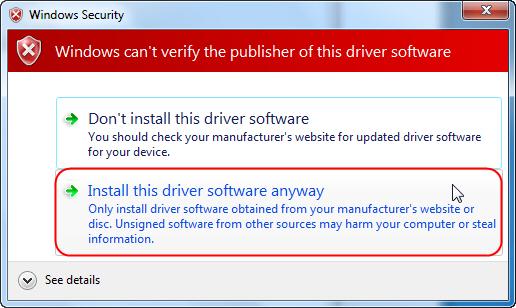
Click Install this driver software anyway.
Step 12
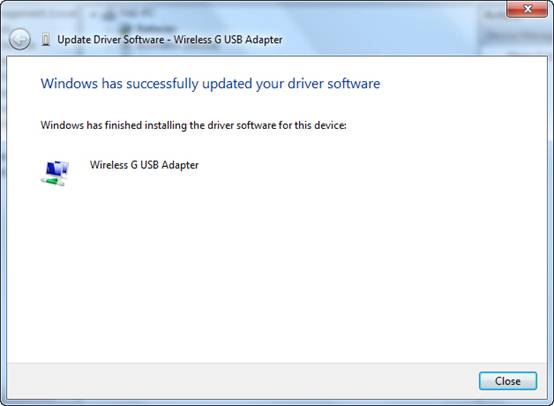
Click Close.
If there are any further problems, please visit our FAQ page or contact TP-Link support.
Is this faq useful?
Your feedback helps improve this site.
What’s your concern with this article?
Dissatisfied with product
Too Complicated
Confusing Title
Does not apply to me
Too Vague
Other
We'd love to get your feedback, please let us know how we can improve this content.
Thank you
We appreciate your feedback. Click here to contact TP-Link technical support.
We have updated our Policies. Read Privacy Policy and Terms of Use here. This website uses cookies to improve website navigation, analyze online activities and have the best possible user experience on our website. You can object to the use of cookies at any time. You can find more information in our privacy policy .
We have updated our Policies. Read Privacy Policy and Terms of Use here. This website uses cookies to improve website navigation, analyze online activities and have the best possible user experience on our website. You can object to the use of cookies at any time. You can find more information in our privacy policy .
Basic Cookies
These cookies are necessary for the website to function and cannot be deactivated in your systems.
Analysis cookies enable us to analyze your activities on our website in order to improve and adapt the functionality of our website.
The marketing cookies can be set through our website by our advertising partners in order to create a profile of your interests and to show you relevant advertisements on other websites.