How to Add Omada Devices to Omada Cloud-Based Controller
Omada Cloud-Based Controller (CBC), existing entirely in the cloud for the Omada Software Defined Networking (SDN) platform, provides 100% centralized
cloud management of Omada access points, JetStream switches, and Omada routers—all controlled from a single interface.
To manage your network with CBC, the general process is: 1) Pre-configure CBC; 2) add Omada devices; 3) assign licenses to activate management. Please refer to Omada Cloud-Based Controller Deployment Guide for deploying your CBC.
Step 1. Pre-Configure CBC
First, you need to create your CBC and obtain the licenses, which will not be introduced here. During the Quick Setup Wizard of your CBC, you can add Omada devices via SN, which will be described later.
After that, it is recommended to pre-configure the Wired Networks to avoid network abnormalities after adopting the devices. Specifically, you need to first choose the model of your Omada Gateway, set the WAN port, and complete the Internet settings according to your ISP's requirements; you may also need to configure LAN according to your local network requirements.
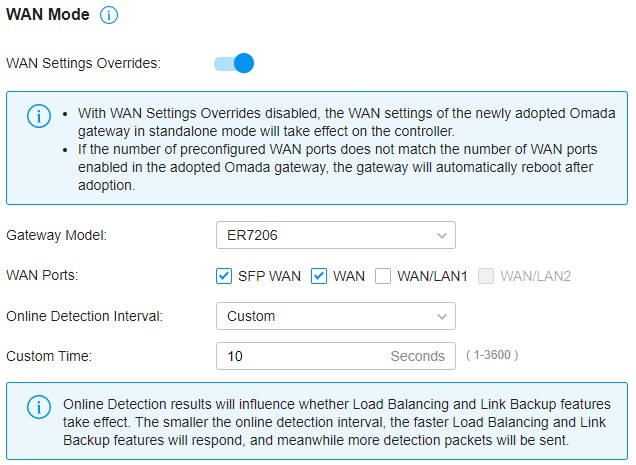
You can also choose to configure all the features required now, but make sure that the VLAN, ACL, Portal, and other settings you configure will not cause the Omada devices to be unable to access the Internet, otherwise, CBC may lose connection with the devices and you may have to hardware reset them.
Step 2. Add Omada devices
There are four methods to add Omada devices to your CBC.
Make sure your Omada devices are supported by CBC, please refer to CBC Devices for all supported models.
1 Add devices via SN
1.1 Preparation
Omada devices can be added to your CBC in factory reset mode, and make sure they have access to the Internet.
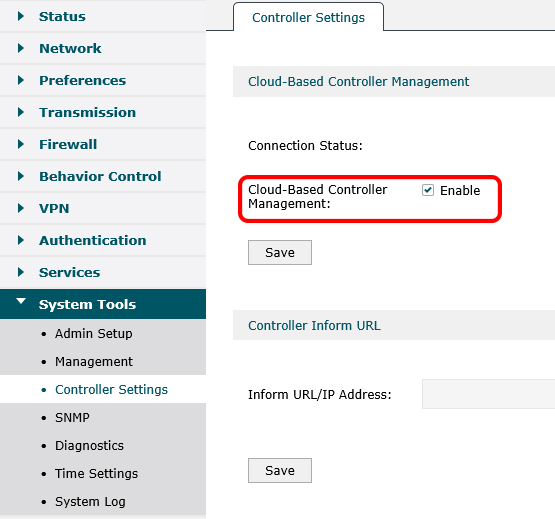
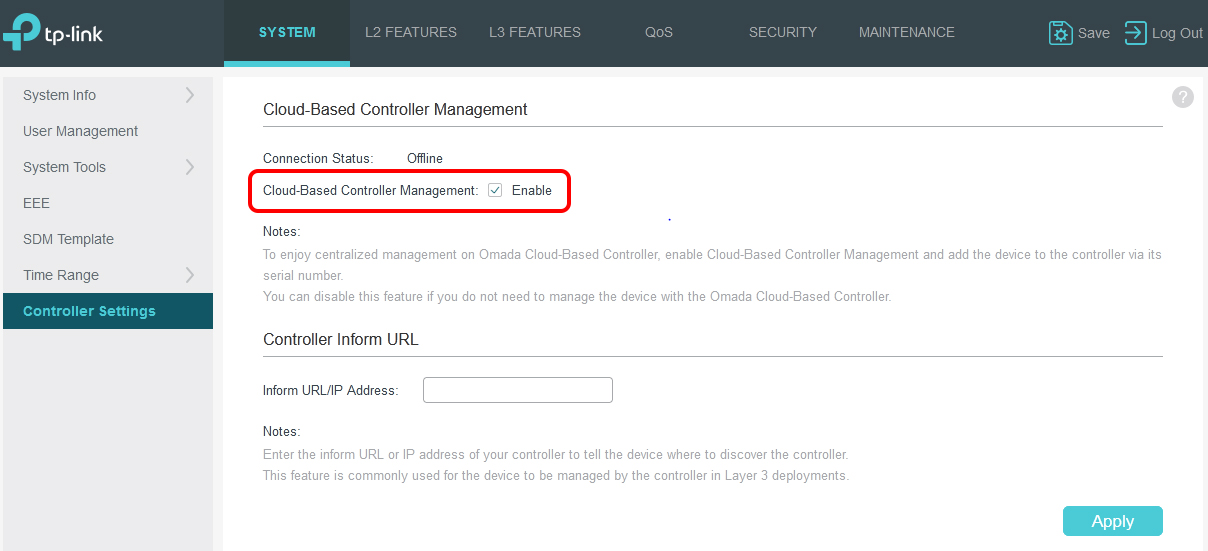
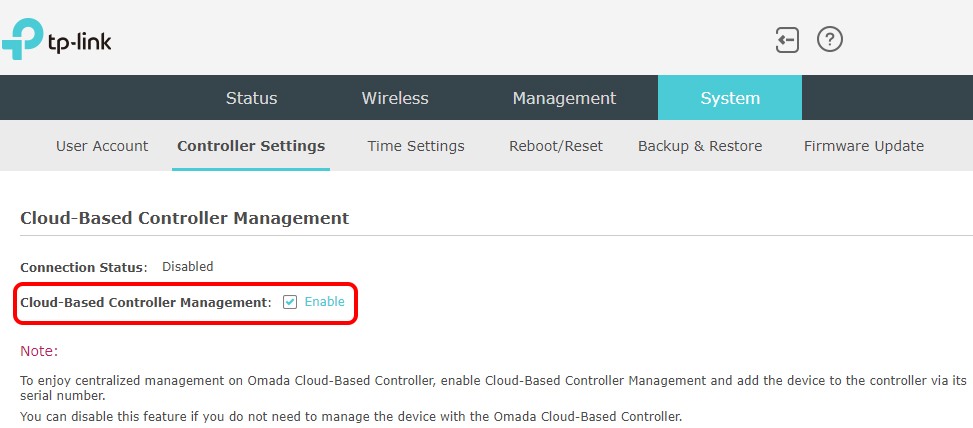
If you have already set it up in the standalone mode, reset it or visit the standalone interface and enable the “Cloud-based Controller Management” feature in the Controller Settings.
- Omada Gateway
- JetStream Switch
- Omada EAP
1.2 Input SN
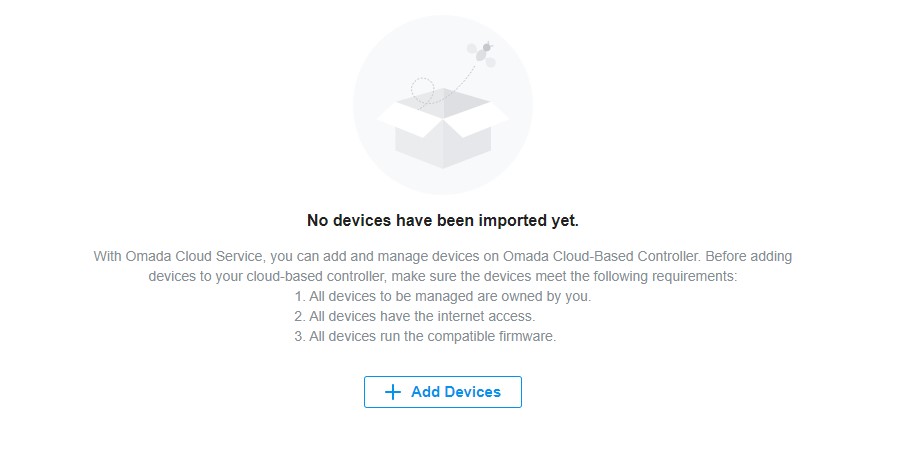
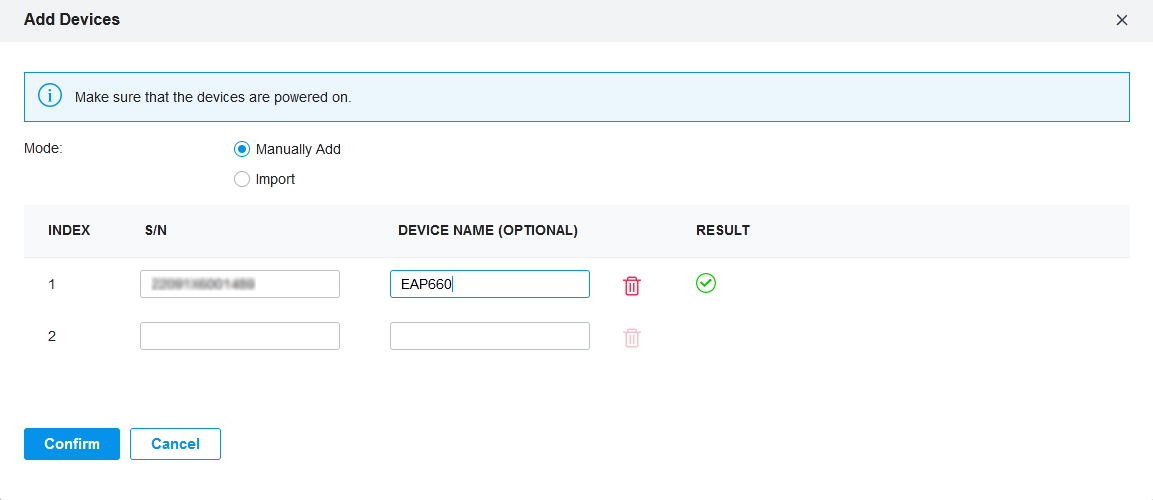
Go to Devices, click “+ Add Devices”.
Then add your devices’ SN manually and CBC will display the result. Devices in  status are ready to be imported.
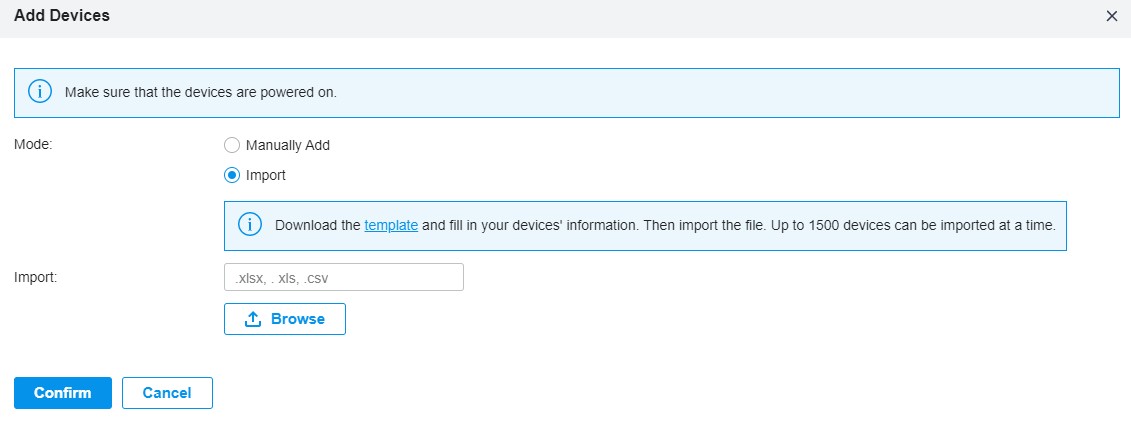
You can also select “Import”, download the template and fill in your devices’ information, then import the file.
If there is an error message, please solve the problem according to the error information and try again. If you just power on the devices, they may not be connected to CBC yet, it may prompt the devices to be offline, please wait a few minutes and try again.
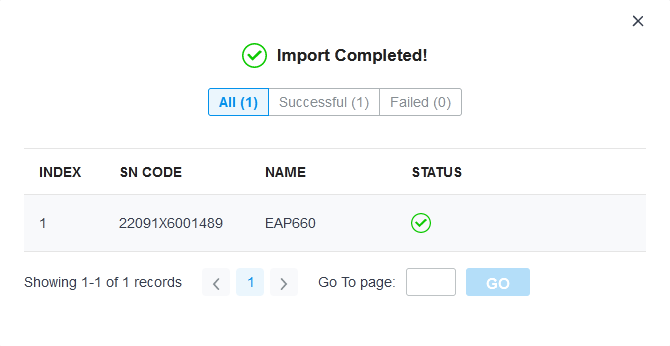
Click "Confirm" and CBC will then attempt to import the devices and display the import results.
2 Use Omada Discovery Utility
When the Omada device and the Omada SDN Controller are on different networks, Omada Discovery Utility helps the Omada devices communicate with the controller. The Utility can also help Omada devices communicate with your CBC.
2.1 Download and Install Omada Discovery Utility
Download the latest version of Omada Discovery Utility from the website: https://www.tp-link.com/support/download/omada-software-controller/#Omada_Discovery_Utility
Then please follow the FAQ to install Java and run the utility on a PC connected to the same network as your Omada devices.
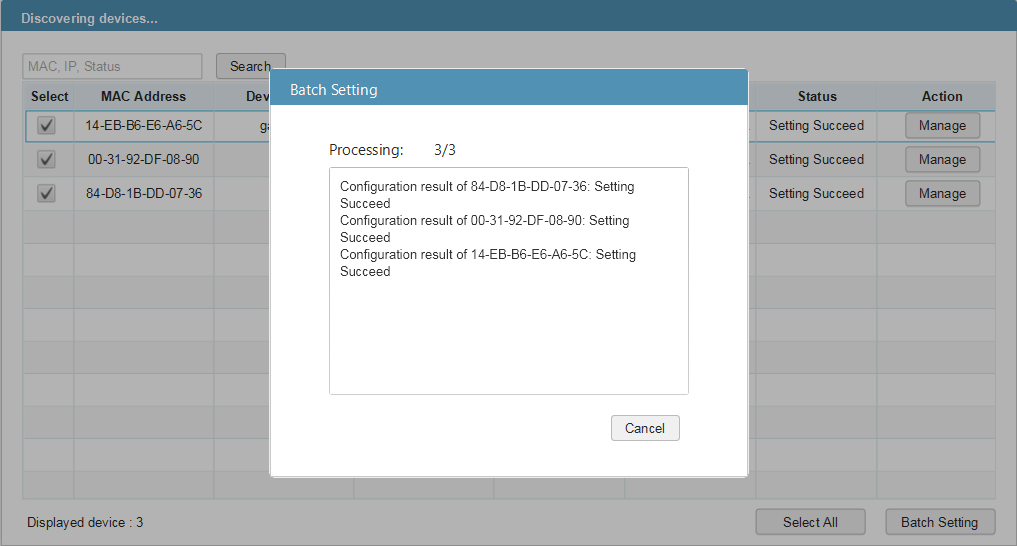
After a while, you will see all Omada devices in the network on Utility, select all of them, and click “Batch Setting”, now you need to obtain the inform URL of your CBC.

2.2 Obtain the Inform URL of your CBC
Log in to Omada Cloud, click your CBC, and go to Details, you can see the CBC Inform URL.
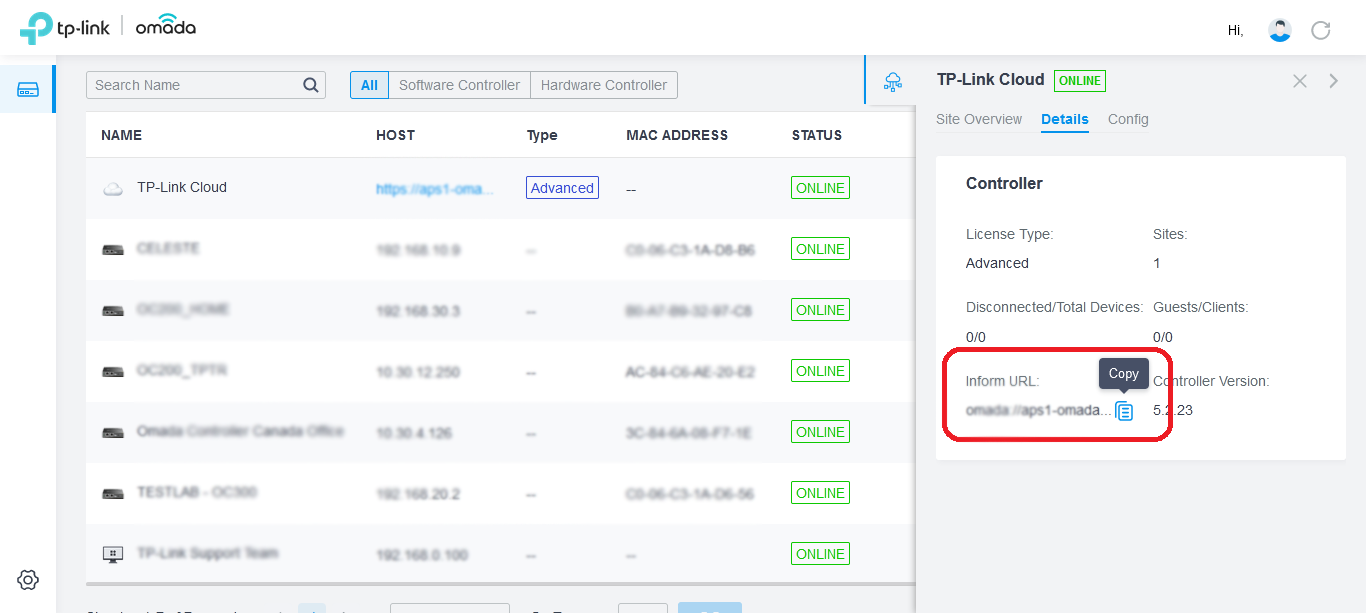
Click the “Copy” button then paste it to the Utility, enter the username and password (both “admin” by default) and click “Apply”, then the Utility will try to adopt the devices and provide the Inform URL, you will be able to see the setting result.
3 Use the Standalone Interface
You can use this method if you have a small number of devices, or if you have devices already running in the standalone mode.
As shown in the figures in Chapter 1.1, there is also “Inform URL/IP Address” setting in the “Controller Settings” on the standalone interface. You can refer to Chapter 2.2 to obtain the Inform URL of your CBC and paste it to the “Inform URL/IP Address” setting, then the device will contact your CBC.
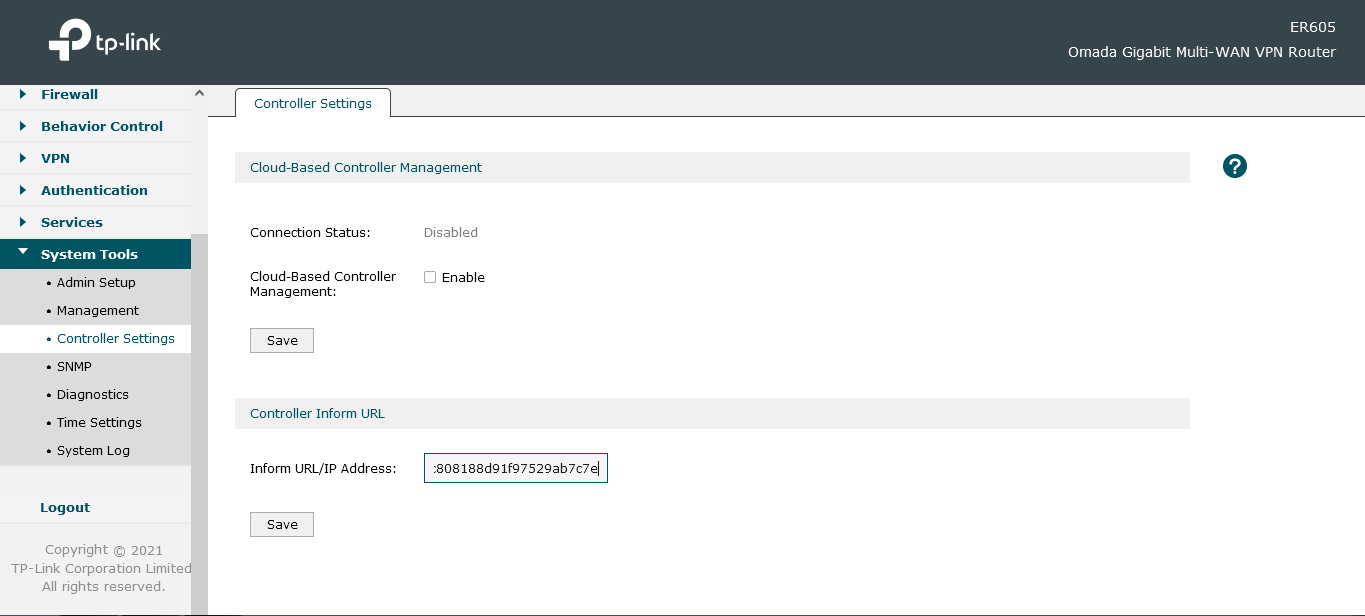
Note: Since your device has been already running in standalone mode, the password must have been modified. When CBC tries to adopt it, please enter the correct username and password.
4 Use the CLI command
JetStream switch supports setting the CBC Inform URL through the “controller inform-url [controller-url]” command, which should be executed in the global configuration mode. An example is shown below:
Switch (config)# controller inform-url omada://xxx-omada-device.tplinkcloud.com?dPort=29810&mPort=443&omadacId=xxxxxxxxxxxxxxxxxxxxxxxxxxxxx
Step 3. Adopt and Manage Omada devices
Now you can see the added Omada devices on the Devices page, click the ![]() button to adopt, or choose “Batch Action” for batch adoption.
button to adopt, or choose “Batch Action” for batch adoption.
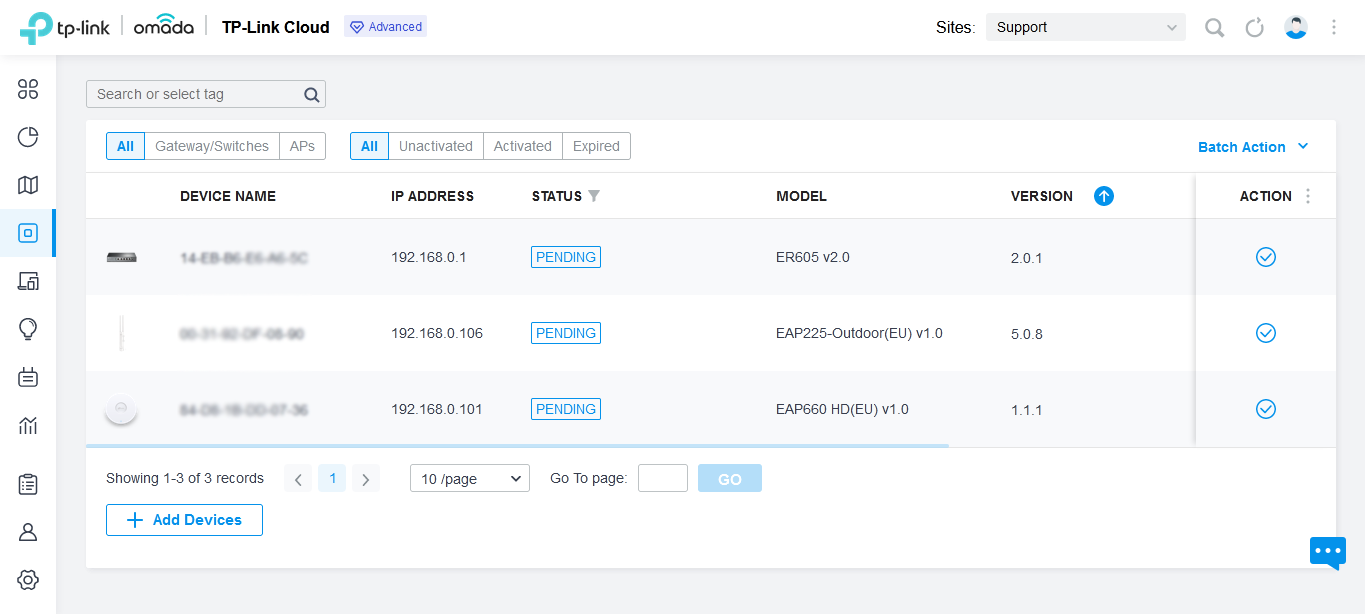
CBC will attempt to adopt the devices using the default username and password “admin”. If you have modified them before, then you will need to enter the correct username and password.
After that, the devices’ status will change from Pending to Adopting, then Provisioning, and finally to Unactivated.
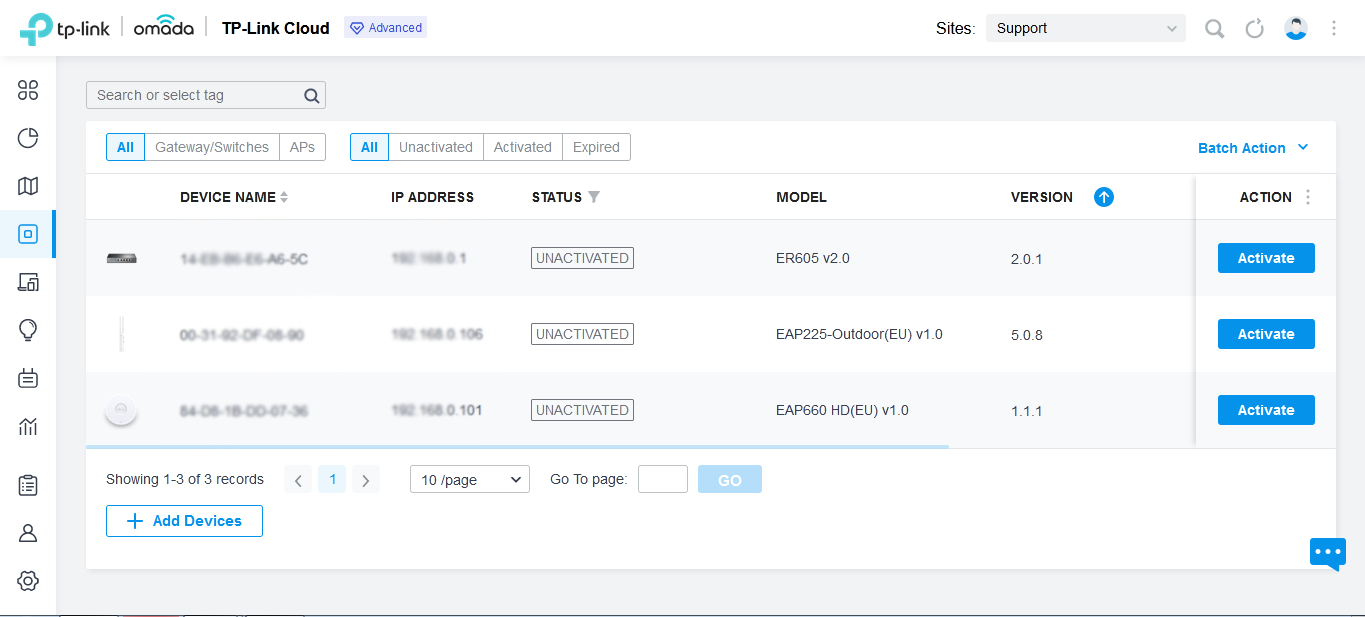
Now, you can click the “Activate” button to assign licenses to the devices, you can also choose “Batch Action” for batch activation.
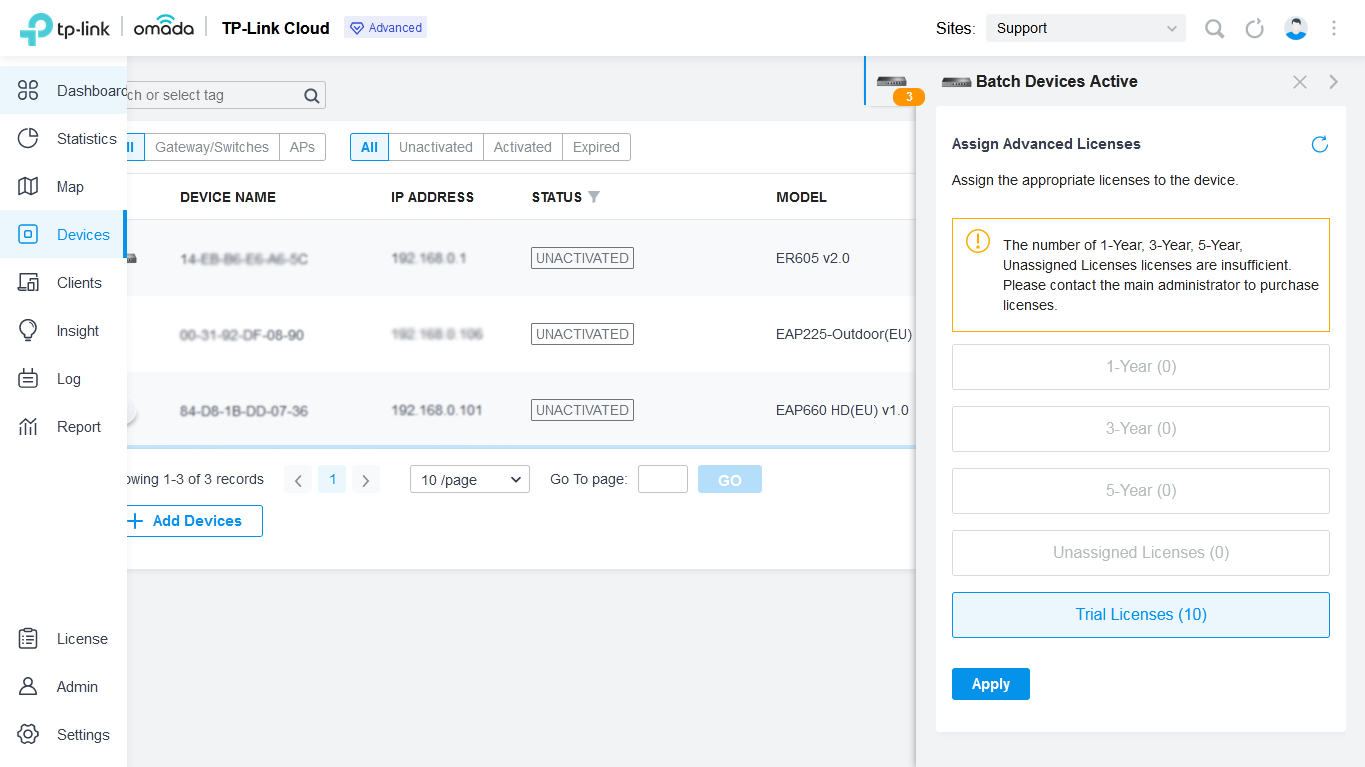
After licenses are assigned, CBC will continue to adopt the devices, and after a period of time, the devices’ status will eventually become Connected. During this time, your devices may reboot, or you may lose Internet connection, which is normal.
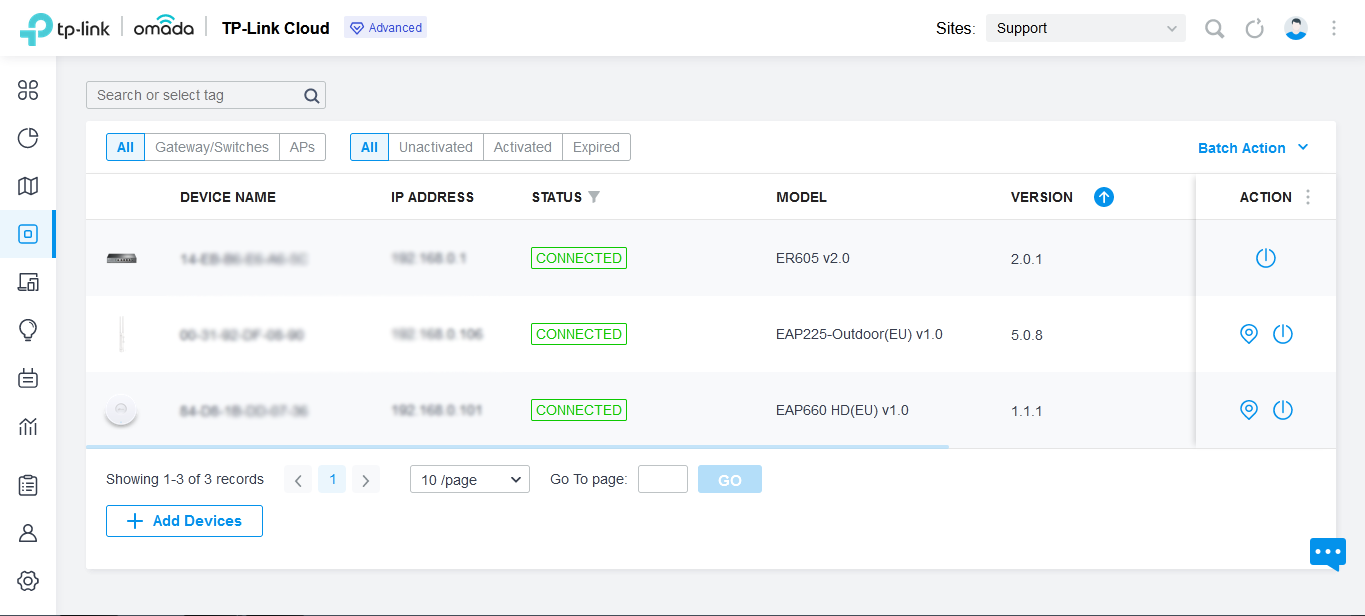
Now your Omada devices have been properly added to CBC, you can configure some other advanced features, and you can monitor and manage your network through CBC anytime, anywhere.
Is this faq useful?
Your feedback helps improve this site.