How to manage guest network of SR20
Via Kasa App:
1. Go to Devices and tap the smart home router.
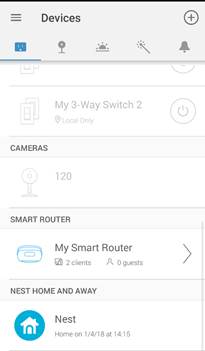
2. Tap Guest Network.
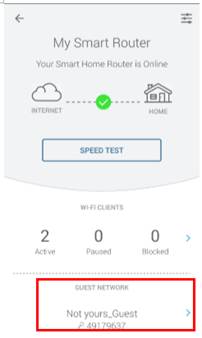
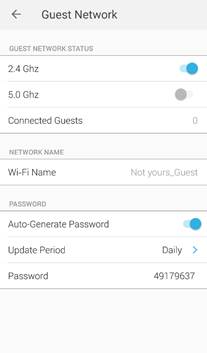
3. Check or change guest network status. Customize Wi-Fi name and password.
Note: You are not allowed to use touch screen or web management interface to manage the router unless it’s setup successfully via Kasa App.
Via touch screen:
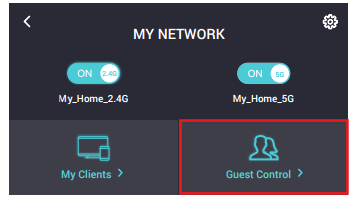
1. On the main Home screen, tap Network Controls.
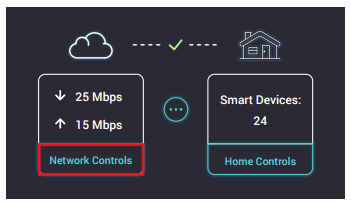
2. Tap Guest Control.
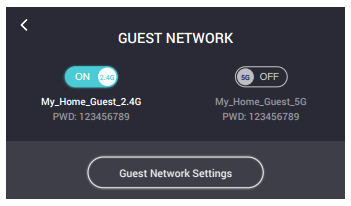
3. On the Guest Network screen, you can toggle the 2.4GHz and/or 5GHz Guest Network on or off.
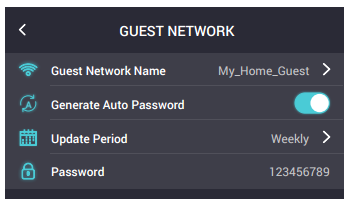
4. To make changes to Guest Network, tap Guest Network Settings. You can change the Guest Network Name by tapping on it and set the frequency of the automatic password renewal to daily, weekly, or monthly. To create your own password, disable the Generate Auto Password and enter a new password.
Via web management interface:
1. Visit http://tplinkwifi.net, and log in with your Kasa account.
2. Go to Advanced > Guest Network. Locate the Wireless section.
3. Create 2.4GHz and 5GHz guest networks according to your needs.
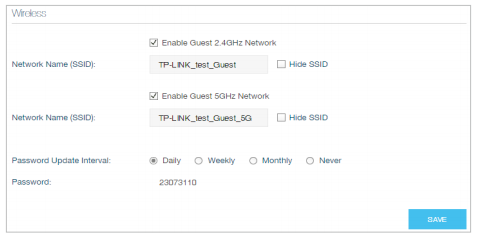
1 ) Enable 2.4GHz network or 5GHz network or enable both according to your needs.
2 ) Set an easy-to-identify SSID. Don‘t select Hide SSID unless you want your guests and other people to manually input this SSID for Wi-Fi access.
3 ) The 2.4GHz and 5GHz guest networks share one password. By default, the guest network password updates daily. You can change the update interval to weekly or monthly. Or you can also select Never to set a static password for your guest networks. If you select Never, please create a password between 8 and 63 ASCII characters or between 8 and 64 hexadecimal characters (0-9, a-f, A-F).
4. Click SAVE. Now your guests can access your guest network using the SSID and password you set!
Get to know more details of each function and configuration please go to Download Center to download the manual of your product.
Is this faq useful?
Your feedback helps improve this site.