In a certain network environment, users may need to configure a particular DNS address for his/her network. This article aims to guide you change the DNS server settings on your Deco system.
Before configuration:
1. Have the latest Deco app installed on your mobile phone.
2. Make sure the mobile phone is connected to Deco's Wi-Fi network.
3. Close the Deco App if it is already running in the background.
4. Re-launch the Deco App.
Note: You can change the DNS settings through the Deco app only when your mobile phone connects to Deco's Wi-Fi network and you have logged in to the Deco app with the owner account. Force close the Deco app in the background and re-launch it aims to clear the app cache.
Change the DNS server settings
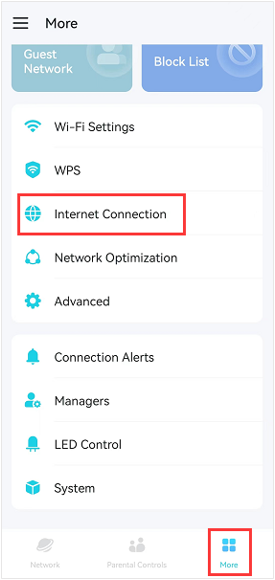
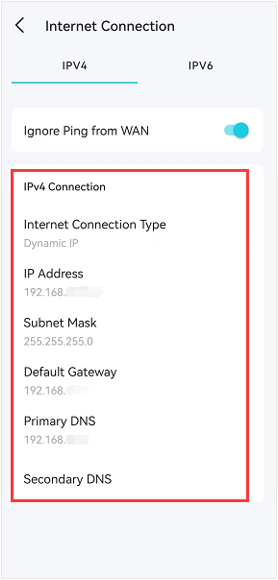
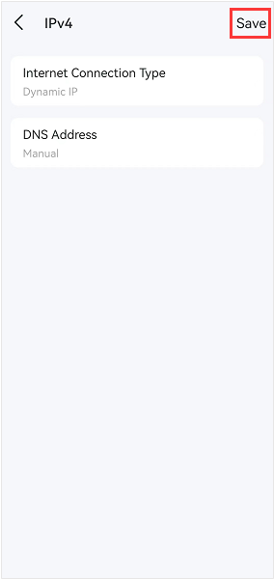
1. Tap More on the Deco app, then click on Internet Connection -> tap IPv4 Connection.
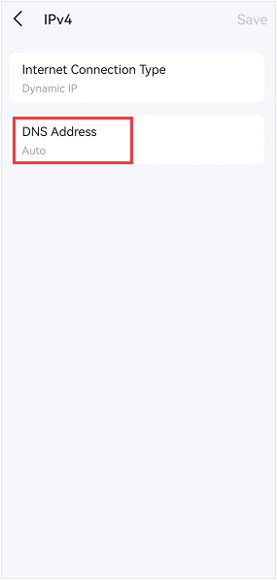
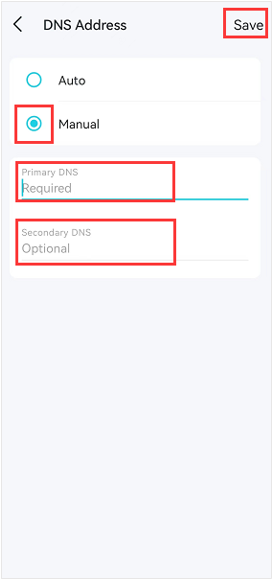
2. Tap DNS Address, select Manual,type in your preferred DNS server settings, then click on Save.
3. Click Save again, and the new DNS settings will take effect automatically.
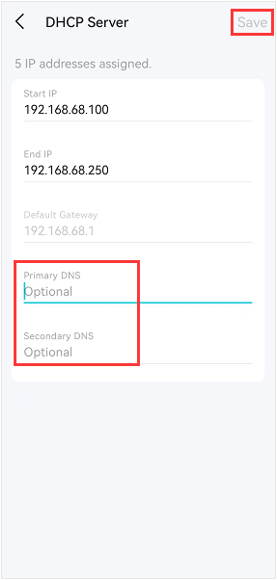
4. If your deco doesn't allow you to change the DNS on the WAN, you may try to change the DNS on the LAN.
Go to Deco APP -> More -> Advanced-> DHCP Server page to change the DNS server,and click on Save to save the settings.
To get to know more details of each function and configuration please go to Download Center to download the manual of your product.
Is this faq useful?
Your feedback helps improve this site.
What’s your concern with this article?
Dissatisfied with product
Too Complicated
Confusing Title
Does not apply to me
Too Vague
Other
We'd love to get your feedback, please let us know how we can improve this content.
Thank you
We appreciate your feedback. Click here to contact TP-Link technical support.
This website uses cookies to improve website navigation, analyze online activities and have the best possible user experience on our website. You can object to the use of cookies at any time. You can find more information in our privacy policy . We have updated our Policies. Read Privacy Policy and Terms of Use here.
This website uses cookies to improve website navigation, analyze online activities and have the best possible user experience on our website. You can object to the use of cookies at any time. You can find more information in our privacy policy . We have updated our Policies. Read Privacy Policy and Terms of Use here.
Basic Cookies
These cookies are necessary for the website to function and cannot be deactivated in your systems.
Analysis cookies enable us to analyze your activities on our website in order to improve and adapt the functionality of our website.
The marketing cookies can be set through our website by our advertising partners in order to create a profile of your interests and to show you relevant advertisements on other websites.


_EU_01_normal_1593397154499k.jpg)