How to customize basic wireless settings of TP-Link cable modem routers(Blue UI)
The router’s wireless network name (SSID) and password, and security option are preset in the factory. The preset SSID and password can be found on the product label. You can customize the wireless settings according to your needs.
Follow the steps below:
Note: Archer CR700 is used for demonstration in this article.
- Please refer to How to log into the web-based management interface of Archer CR700?
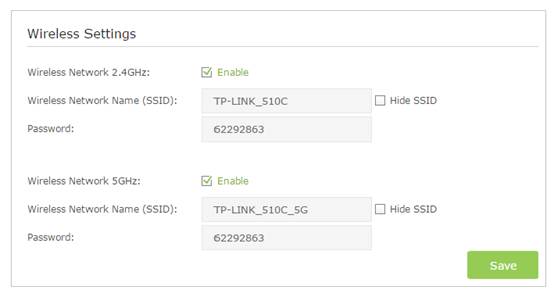
- Go to Basic > Wireless page.

To enable or disable the wireless function:
Enable the Wireless Network 2.4GHz or 5GHz. If you don’t want to use the wireless function, just uncheck the box. If you disable the wireless function, all the wireless settings won’t be effective.
To change the wireless network name (SSID) and wireless password:
Enter a new SSID using up to 32 characters. The default SSID is TP-Link_XXXX and the value is case-sensitive.
Note:
If you use a wireless device to change the wireless settings, you will be disconnected when the settings take effect. Please write down the new SSID and password for future use.
To hide SSID:
Select Hide SSID, and your SSID will not broadcast. Your SSID won’t display when you scan for local wireless network list on your wireless device and you need to manually join the network.
To change the mode or channel:
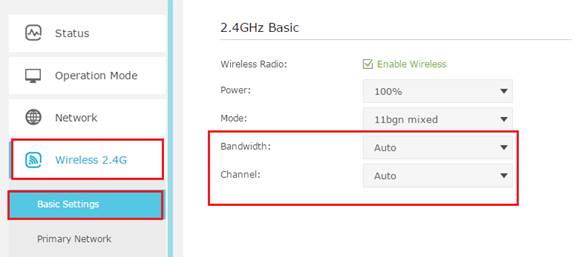
We recommend you don’t change the default mode or channel unless necessary.
Go to Advanced > Wireless 2.4GHz or 5GHz >Basic Settings page
Note: Single band modem router only has 2.4GHz wireless setting.

Get to know more details of each function and configuration please go to Download Center to download the manual of your product.
Is this faq useful?
Your feedback helps improve this site.