How can I connect my Tapo camera to a NAS?
The Tapo camera supports the standard ONVIF protocol (Profile S) as well as RTSP protocol, so it can work with third-party NVR or NAS devices that also support the standard ONVIF protocol.
If you want to manage and view the camera on a third-party NVR or NAS device, you are suggested to contact the NVR or NAS support or visit their official website to find the instructions to add the camera on your NVR or NAS devices (different NVR or NAS devices may have different configuration methods). This article will show you some basic parameters that it may require to connect the Tapo camera to your NVR or NAS device.
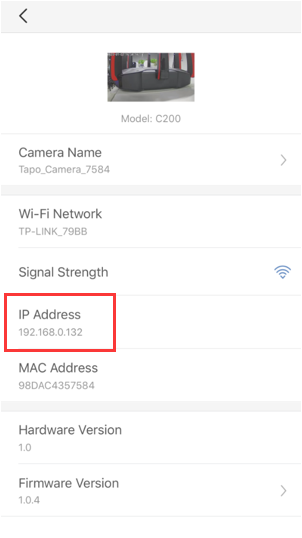
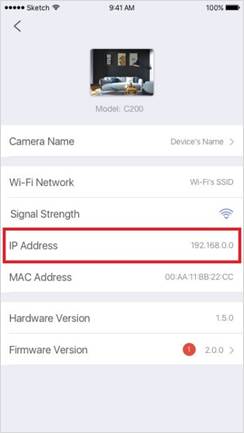
1. The IP address of the camera.
The IP address of the camera is assigned by your host router and you can find it on your host router’s DHCP list or on the Tapo app (Camera Settings -> Navigate to the camera details page). For detailed instructions, please refer to https://www.tp-link.com/en/support/faq/2616/
2. The ports for standard ONVIF and RTSP protocols..
ONVIF Service Port: 2020
RTSP Service Port: 554
3. The username/password of the camera
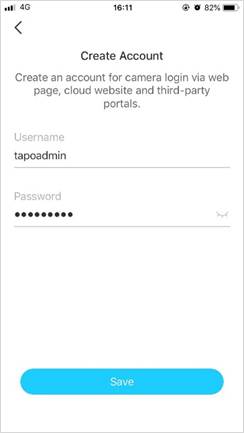
You can create your own username/password on the Tapo app.
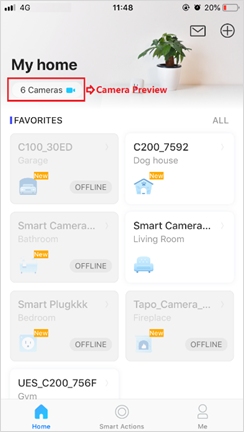
3.1 On the home page, tap on your camera model card or tap Camera Preview > Manage to go to the Live View page.
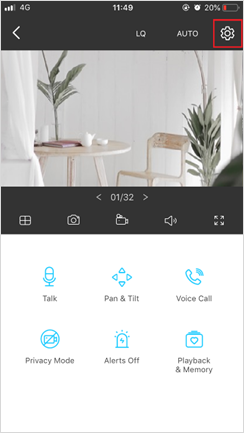
3.2 On the Live View page, tap the gear icon to enter the Camera Settings page.
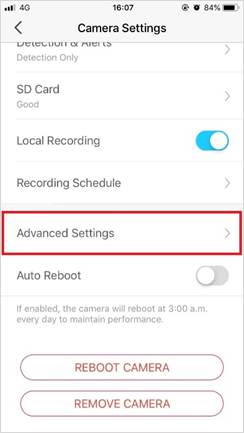
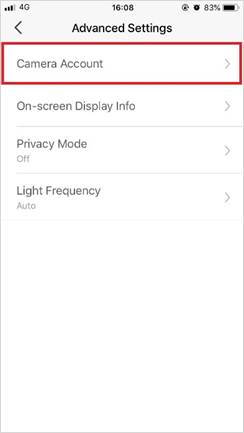
3.3 Tap Advanced Settings and select Camera Account to create an account (username and password) for the camera and save it.
Get to know more details of each function and configuration please go to Download Center to download the manual of your product.
Is this faq useful?
Your feedback helps improve this site.