Changing Channel and Channel Width on a TP-Link Router (new logo)
A wireless channel determines which operating frequency will be in use. It is not necessary to change the channel unless you’re noticing interference problems with nearby access points. The Channel Width setting is preset to automatic, allowing the client’s channel width for to adjust automatically.
Before we begin, please log into web management interface: connect your computer, phone or tablet to the TP-Link router via Ethernet or Wi-Fi, use the default access printed on the router to visit the web management interface.
Related Article: Changing Channel and Channel Width Settings on a TP-Link Router (Blue GUI)
Single-band Router
Step 1 Click Wireless>Basic Settings.
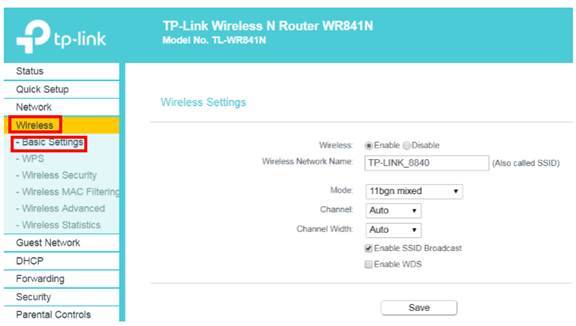
Step 2 Change Channel and Channel Width then click Save.
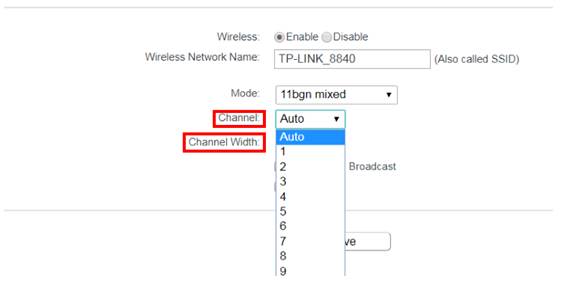
For 2.4GHz, channels 1, 6 and 11 are generally best, but any channel can be used.
Dual-band Router
Step 1 Click Advanced>Wireless>Wireless Settings.
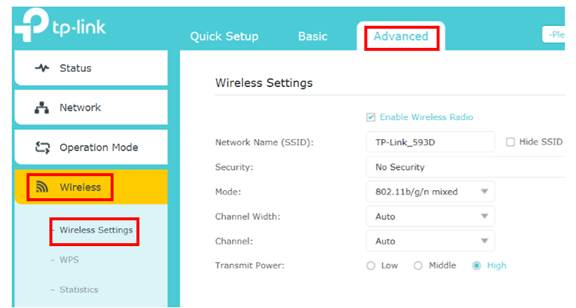
Step 2 Click 2.4GHz, and change Channel and Channel Width, then click Save.
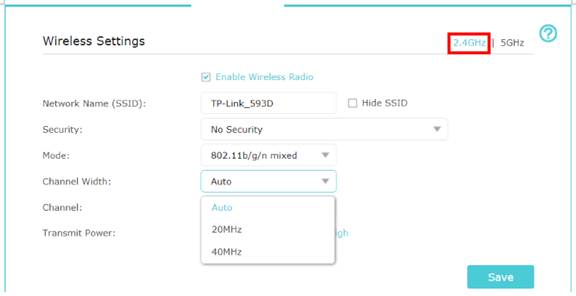
Step 3 Click 5GHz, and change Channel and Channel Width, then click Save.
For 5GHz, we recommend you use channel in Band 4, which is channel 149-165, if your router supports it.
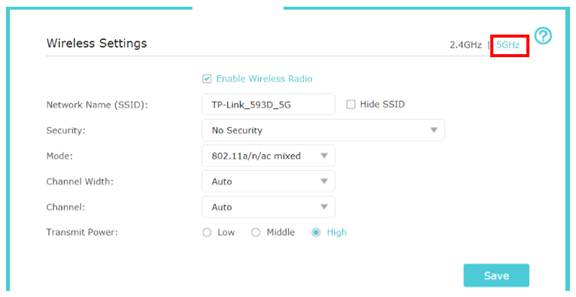
Note: If your router is tri-band, repeat step 3 to change channel and channel width of the third band.
Get to know more details of each function and configuration please go to Download Center to download the manual of your product.
Is this faq useful?
Your feedback helps improve this site.