How to configure the VPI/VCI on TD-8616
Αυτό το άρθρο ισχύει για:
The TD-8616 supports many popular PVCs, fit for most of the network environment around the world, such as 0/35, 8/35, 1/100, 0/32, 0/38, 1/32 etc.
If you are not sure whether the VPI/VCI provide by your ISP is not included or not, please try to check and input the VPI/VCI on the modem.
Preparation
Since the ADSL2+ modem only has a bridged mode, there is no DHCP function on the ADSL2+ modem. We have to manually assign an IP address as 192.168.1.x to the computer to match the default IP address (192.168.1.1) of the ADSL2+ modem. Please click here for detailed instruction.
Connect the DSL line to the modem and your computer to the modem by using than Ethernet cable.
Step 1
Open the web browser and type the IP address 192.168.1.1 into the address bar and then Press Enter.
Step 2
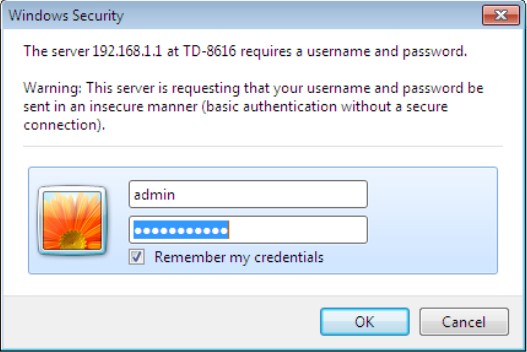
Type the username and password into the boxes of the login page, the default username and password both are admin, then press Enter.

Step 3
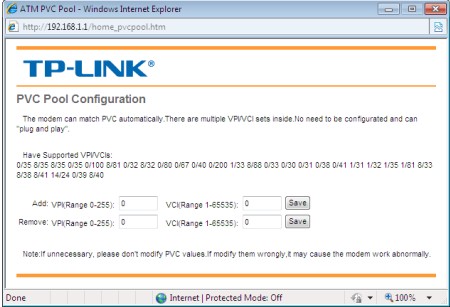
Click on Basic Setup->WAN Setting. click on PVC Pool, and you can see the VPI/VCI list. If you cannot find your VPI/VCI, please go to Step 4.

Step 4
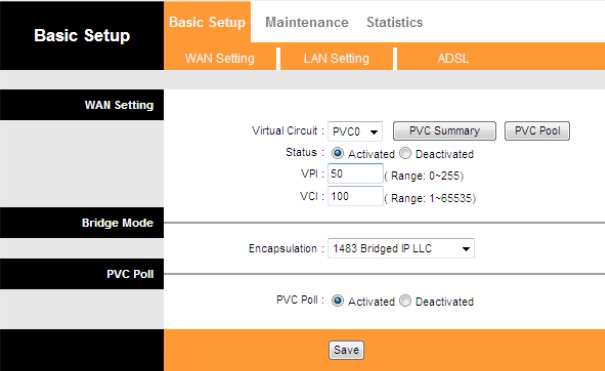
Click on Basic Setup->WAN Setting. Manually put in the VPI and VCI number which is provided by your ISP. Click on Save.

Note:
The above IP settings are for logging into the Web-based Utility of TP-Link ADSL2+ modem for configuring.
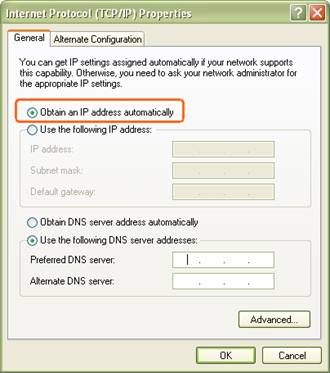
After you finish configuring, please re-configure the IP settings of your computer to Obtain an IP address automatically & Obtain DNS Server address automatically to suitable for the router in order to connect to Internet after you have done the configuration on the device.

Είναι χρήσιμο αυτό το FAQ;
Τα σχόλιά σας συμβάλλουν στη βελτίωση αυτού του ιστότοπου.