How do I move my Kasa device to a different wireless network?
*Note: All Kasa devices require and only work with the Kasa for Mobile App
Currently there is no setting on Kasa APP allowing us to switch to a different wireless network directly, we suggest you apply the same wireless settings (including the wireless network name, wireless encryption, and password) on your new router as on the old one, and there will be little necessary to change settings on the Kasa APP or Kasa device.
But if you want to connect to a different wireless network, you may change the wireless network by resetting your kasa device, and then follow the regular setup process.
Here we take KC120 as an example:
Step 1 With your camera plugged in, remove the back cover.
Step 2 Using a paperclip to press and hold the reset button for 5 seconds.
Step 3 Wait till the LED is blinking amber and green, then launch the Kasa App and click on Add device.
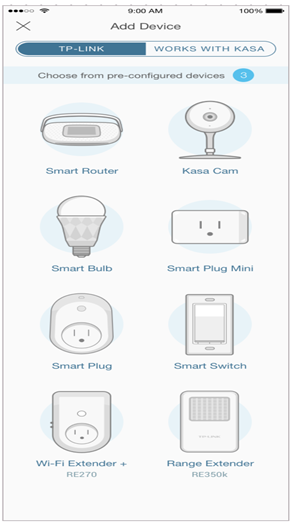
Step 4 tap Choose from Pre-configured Devices.

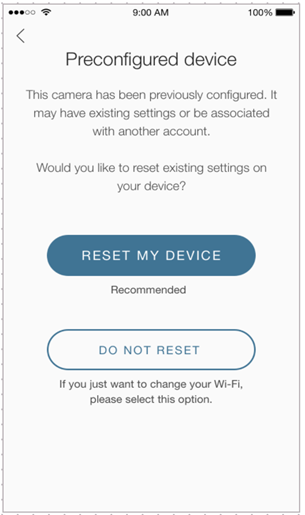
Step 5 You will have an option Reset my Device or Don’t Reset my Device. If you are just changing the wireless network choose Don’t Reset my Device.

*Note: Be aware that selecting RESET MY DEVICE will restore your camera to factory defaults, and will delete all activity and clips associated with your camera.
If you need further assistance contact TP-Link Customer Support here.
Is this faq useful?
Your feedback helps improve this site.