How to add an additional unit to your Deco network
NOTE:
For Deco X and XE series models:
Satellite Deco will join the Deco network automatically within two minutes after you power them on if the Main Deco and the Satellite Deco are from the same package.
After creating a Deco network, you can add more Decos to the network to expand the Wi-Fi coverage and manage them easily on your Deco app.
Note: Features available in Deco may vary by model and software version. All steps and images described here are only examples and may not reflect your actual Deco experience.
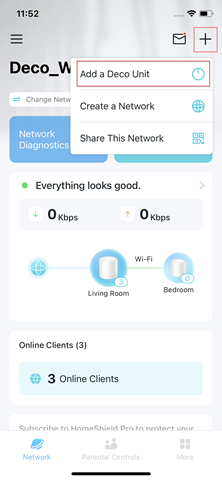
1. Open the Deco app. Go to the Network tab, tap +, and select Add a Deco Unit.
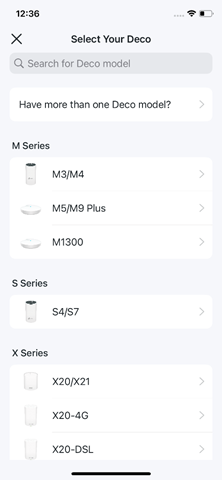
2. Search for and select your Deco model. Follow the app instructions to add the Deco.
Is this faq useful?
Your feedback helps improve this site.

_normal_20230202012857u.png)
TP-Link Community
Still need help? Search for answers, ask questions, and get help from TP-Link experts and other users around the world.