How to configure Wi-Fi Schedules using the tpPLC App (Smartphone)
Configuration Guide
Updated 06-27-2022 08:43:57 AM
 51687
51687
This Article Applies to:
TL-WPA8730 KIT( V1 ) , TL-WPA8630P KIT( V1 V2 ) , TL-WPA7510 KIT( V1 V2 ) , TL-WPA8635P KIT( V2 ) , TL-WPA8635P( V2 ) , TL-WPA8631P , TL-WPA8631P KIT , TL-WPA4530 KIT( V1 V2 ) , TL-WPA9610 KIT( V1 ) , TL-WPA8630P( V2 V2.10 ) , TL-WPA7517 , TL-WPA8630 KIT( V1 V2 ) , TL-WPA8630 KIT(FR)( V1 V2 ) , TL-WPA7517 KIT , TL-WPA4530( V1 V2 )
Step 1: Connect to your Adapter via Wireless
*Note: Adapter will need internet access for this to work
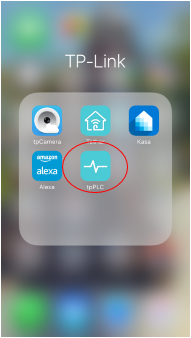
Step 2: Launch the tpPLC APP
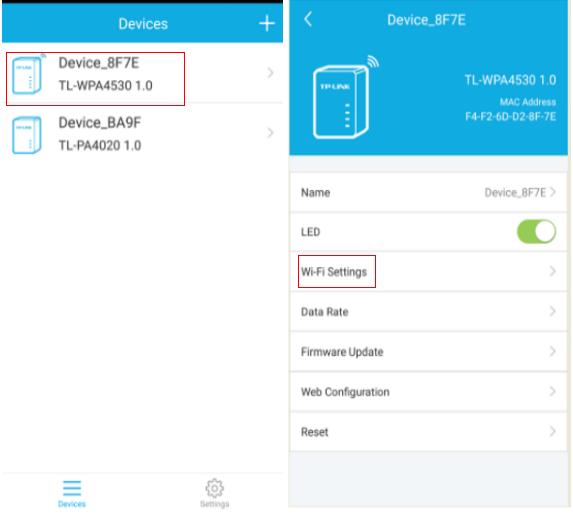
Step 3: Tap on the wireless powerline adapter and select Wi-Fi Settings.
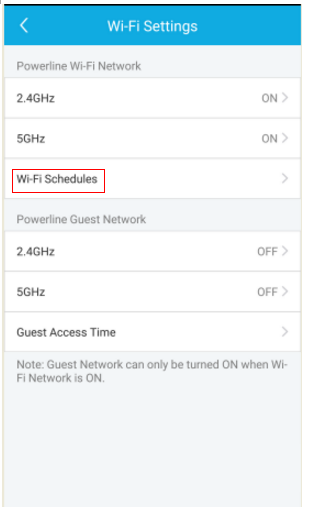
Step 4: Select Wi-Fi Schedules.
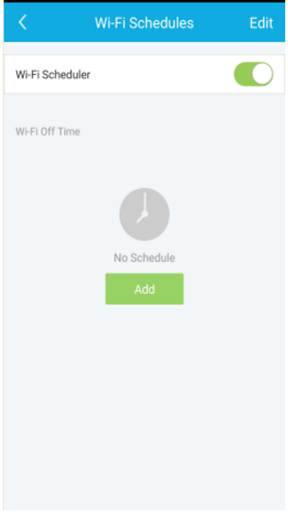
Step 5: Switch on Wi-Fi Scheduler and click Add to add a schedule.
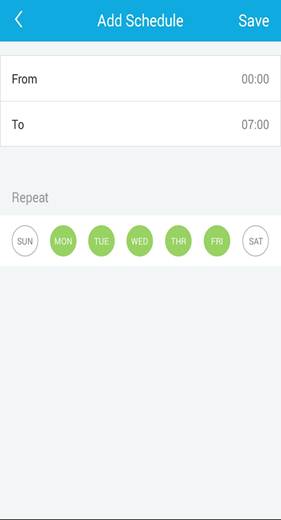
Get to know more details of each function and configuration please go to Download Center to download the manual of your product.
Is this faq useful?
Your feedback helps improve this site.
What’s your concern with this article?
- Dissatisfied with product
- Too Complicated
- Confusing Title
- Does not apply to me
- Too Vague
- Other
We'd love to get your feedback, please let us know how we can improve this content.
Thank you
We appreciate your feedback.
Click here to contact TP-Link technical support.


