How to connect your TP-Link Kasa devices to Google Home
This Guide is show you the process on how to connect your TP-Link Kasa device to your Google Home, please make sure your Google Home is setup already. If not, you can refer to this link to setup the Google Home or contact Google support.
Before we start, please make sure Remote Control of your Kasa device is enabled on your Kasa APP.
Note: For the smart bulb, kasa camera, smart plug and smart switch, if they have been configured successfully, the remote control function is enabled automatically and you won’t see the remote control option on Device Settings page. Only the RE270K/RE370K need to enable remote control function manually, for details instruction, please refer to this link.
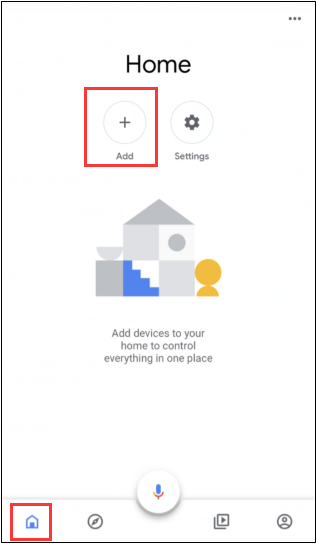
Step 1: Log into Google Home App.
Step 2: Tap “Add” button.
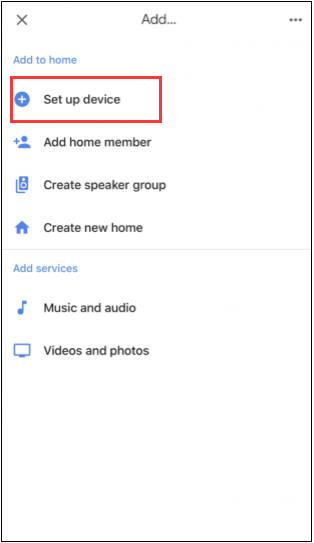
Step 3: Tap “Set up device”.
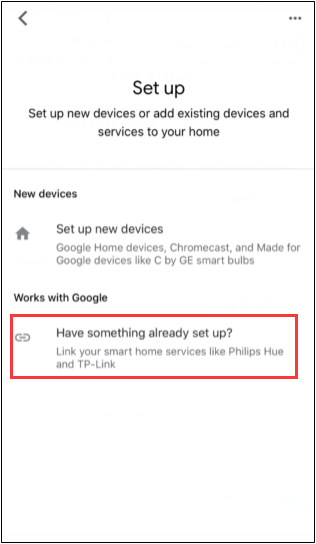
Step 4: Tap “Have something already set up?”
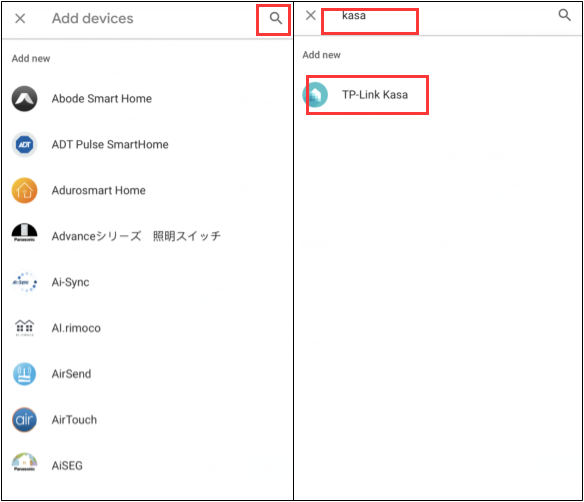
Step 5: Click on Search icon, and search for Kasa. Then tap “TP-Link Kasa”.
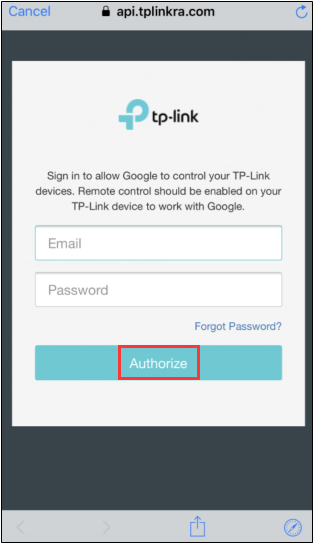
Step 6: Sign into your “KASA” account, then click on Authorize.
(You may see a white screen for a few second while it links up)
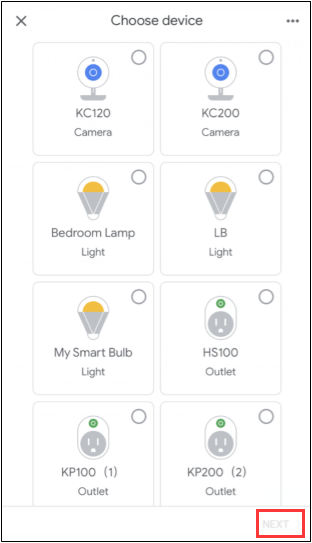
Step 7: Select a device, then click on Next.
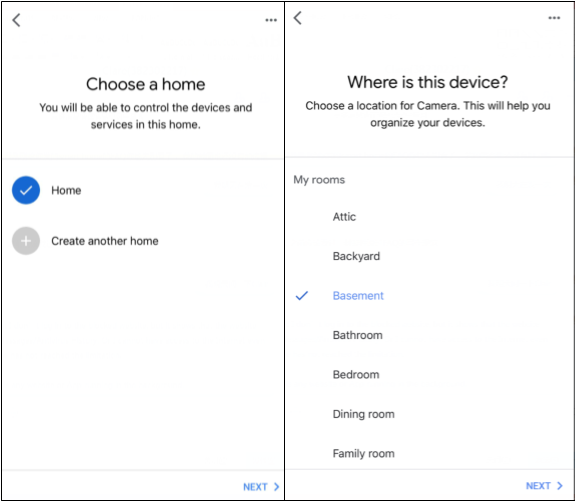
Step 8: Choose a home and room for the smart device, then all have done.
And you can see the linked device in the main page.
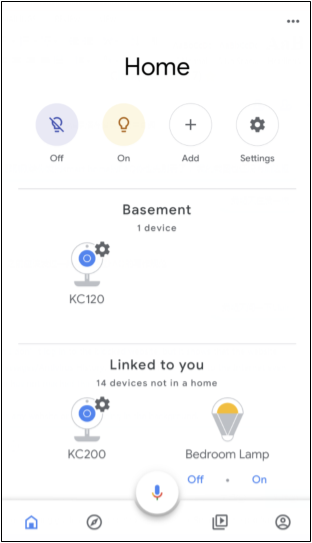
Under the “Linked to you”, you can see the device which is linked to the Google Home but not select a home and room, you can click on the device to select the room or create a room for it.
Use the following guides to help control your TP-Link Smart Home products
http://www.tp-link.com/faq-1558.html
Get to know more details of each function and configuration please go to Download Center to download the manual of your product.
Is this faq useful?
Your feedback helps improve this site.