How to set up IPv6 service on the Archer C8, Archer C9, Archer C5 V2
This Article Applies to:
Note: Please make sure that you are provided IPv6 internet service by your internet provider. If not, please contact with your IPv6 internet provider first.
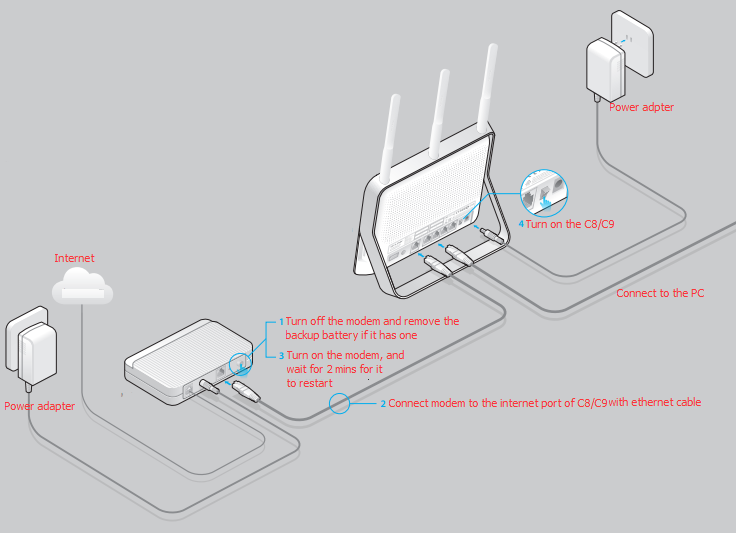
Physical Connection
Take Archer C8 as an example.
If your Internet connection is through an Ethernet cable from the wall instead of through a DSL / Cable / Satellite modem, connect the Ethernet cable directly to the Archer C8’s Internet port.

If you are still not sure how to connect the modem and C8, please refer to the QIG in the package.
Step 1
Log in to the router’s web-based management page, and please click here if you don’t know how to log in.
Step 2
Go to Advanced at the top, then click at IPv6 Support at the left hand side. In the drop-down menu of IPv6 Support, please choose IPv6 Setup.
Step 3
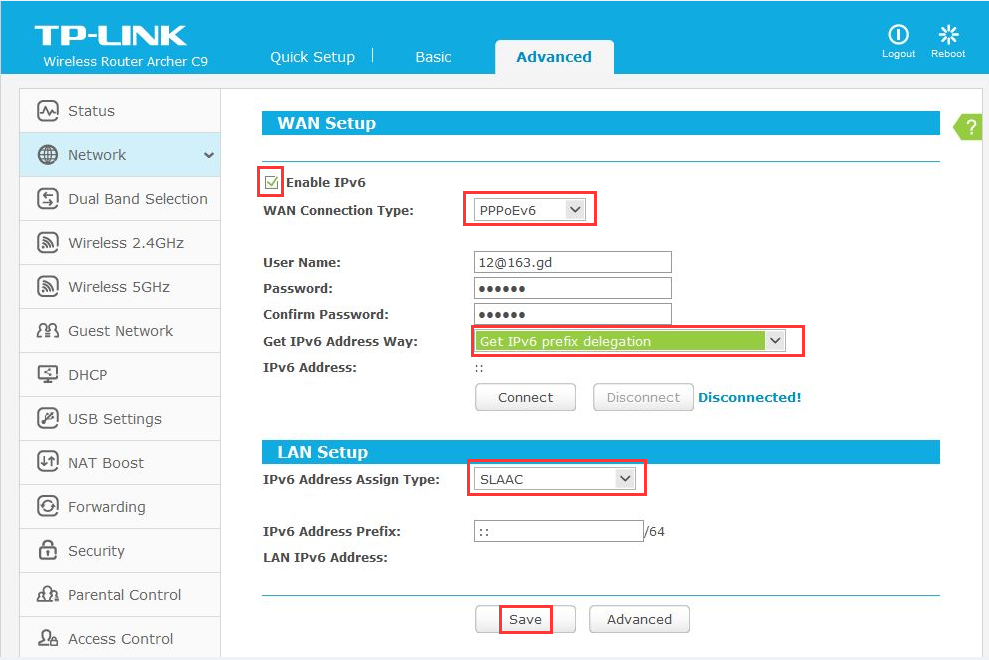
Please make sure that Enable IPv6 has been checked. To Configure WAN Connection Type, if you are not sure what the connection type is, please contact your IPv6 provider. Here takes PPPoEv6 as an example.
After the PPPoEv6 is selected, please input the User name and Password provided by the IPv6 Provider.
For the Get IPv6 Address Way, please choose Get IPv6 prefix delegation.
For the IPV6 Address Assign Type, please choose SLAAC.
Then click at Save.
If you tried above steps, but still no IPv6 internet, please contact with TP-Link Support.

Get to know more details of each function and configuration please go to Download Center to download the manual of your product.
Is this faq useful?
Your feedback helps improve this site.